Every landscaping client comes in with a vision that’s half Pinterest board and half vague feeling. My job in the first consultation is to translate that feeling into something that works with the soil, the slope, the sun exposure, and the budget — usually in that order, because nature doesn’t care about Pinterest. What surprises most homeowners is how often a well-planned concrete paver patio becomes the answer — not because it’s the cheapest option on paper, but because it’s the most forgiving to install correctly, the most durable over time, and the one material I’ve seen repeatedly deliver a finished outdoor space that actually looks like the vision the client brought in on their phone. I’ve spec’d and built enough of these to know where the money goes, where it gets wasted, and what a realistic budget actually buys you — so when I tell you that 400 square feet of patio for under $2,000 is achievable without cutting corners that’ll cost you later, that’s not a headline, it’s a number I’ve hit on job sites.
How a Silly Mistake Turned Into a 400-Square-Foot Backyard Transformation
Once the laughter died down — and once I confirmed the return window had conveniently closed — I decided to lean into the chaos. The original order came in wrong — I’d accidentally ordered double the pavers for a project half the size, and the return window was closing fast. Our original plan was a modest 10×10 sitting area off the back door. But with all those pavers staring at me, we redesigned on the fly into an L-shaped patio that wraps around the back of the house and connects to the fence line. It came in just under 400 square feet, and the total project cost landed right around $1,850. Honestly? Best mistake I ever made.
If you’ve been eyeing your sad patch of backyard grass and wondering whether a real patio is actually within reach, I promise you it is. Here’s exactly how we did it, what I learned the hard way, and what I’d do the same way all over again.
Planning and Prep: The Step That Actually Makes or Breaks Your DIY Concrete Paver Patio Budget
Before you buy a single paver, measure your space twice and then measure it again. Sketch the layout on graph paper or use a free online patio planner. Account for a 10% overage in materials for cuts, breakage, and the inevitable moment where you realize your “square” patio is somehow a trapezoid. Here’s what the prep phase actually involves:
- Mark your layout using stakes and mason’s line. This is your visual guide and your sanity anchor throughout the whole project.
- Excavate 6–8 inches deep across the entire area. You need room for a 4-inch gravel base, a 1-inch sand layer, and your pavers. Rent a sod cutter if you have grass — doing this by hand over 400 square feet is a full-body workout nobody asked for.
- Establish proper slope — aim for about 1/8 inch of drop per foot away from your house. This keeps rainwater draining away from your foundation instead of pooling on your beautiful new patio.
- Compact the subgrade before adding any base material. Skipping this step is how you end up with a patio that looks lumpy and uneven by year two.
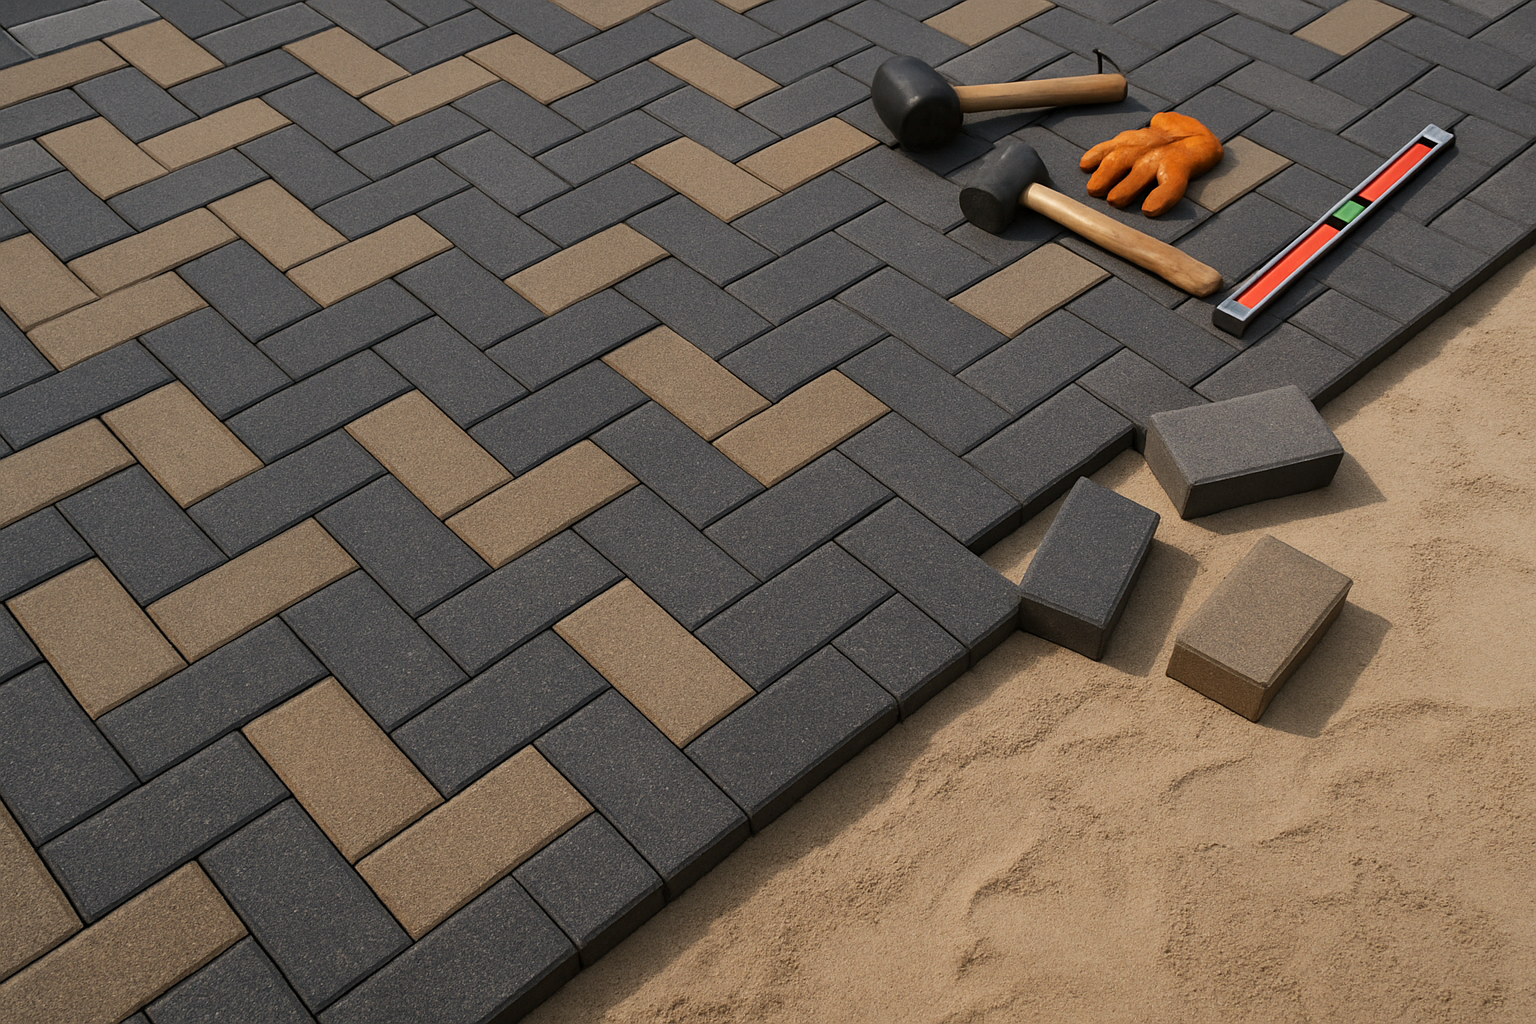
The Paver That Let Me Scale a 400-Square-Foot Patio Without Breaking the Budget
When you’re working with a tight $2,000 budget across 400 square feet, your paver choice makes or breaks the math. The River Red Square pavers gave me a full pallet of uniform, durable units at a price point that didn’t force me to compromise on quality or cut the project scope.
What works
- Full pallet coverage means one order handles most of the base field — no cobbling together multiple SKUs or dealing with inventory gaps mid-project.
- Square format cuts layout time significantly and reduces waste on an L-shaped patio; straight edges mean fewer angled cuts and fewer broken units eating into your overage buffer.
- Consistent color and finish across all 168 units meant no “surprise darker pavers arrived in box three” moments — the final patio looked intentional, not like a patchwork repair.
What doesn’t
- A full pallet is heavy — delivery and unloading require space and either help or equipment; this isn’t a product you casually carry to the backyard.
- The square format, while efficient, doesn’t offer the accent or visual break options that colored or shaped pavers bring — you’re committing to a single-tone look.
I’ll admit I panicked when the pallet arrived and I realized I’d ordered the full 168 units — that’s a lot of commitment staring at you from the driveway — but once I started laying, the consistency and coverage actually came through exactly as promised. River Red Square Concrete Step Stone — Full Pallet of 168 Units
River Red Square Concrete Step Stone — Full Pallet of 168
I ordered once, got 168 matching pavers, and finished my patio without mid-project supply runs or color surprises.
Check Price on Amazon →This post contains affiliate links. As an Amazon Associate, I earn from qualifying purchases at no extra cost to you.