This post contains affiliate links. As an Amazon Associate, I earn from qualifying purchases at no extra cost to you.
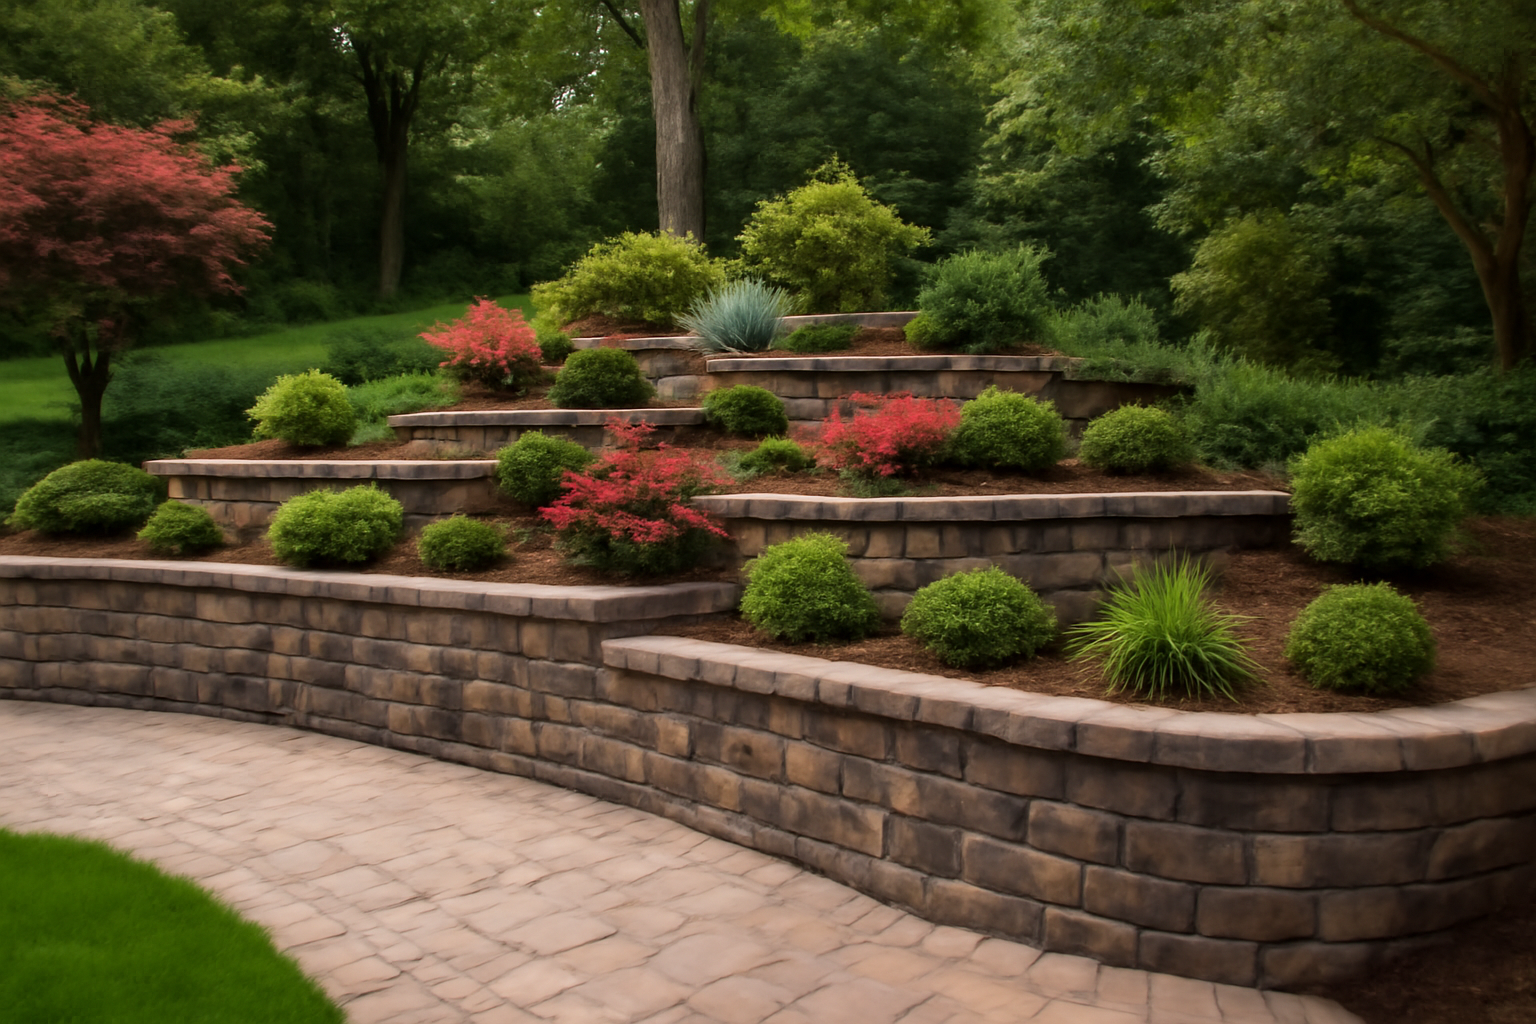
If your yard has an awkward slope, a muddy hill that erodes every time it rains, or a chunk of land you just can’t use, a retaining wall might be the single best investment you make in your outdoor space. I’ve built several over the years — some simple garden-level borders, others full load-bearing structures — and every single one transformed the area in ways I didn’t fully anticipate until it was done. Beyond solving real drainage and erosion problems, a well-built retaining wall creates usable flat space, defines planting beds, and adds serious curb appeal. The key word there is well-built. Done right, these walls last decades. Done wrong, they lean, crack, and fail — sometimes taking your landscaping with them. This guide walks you through everything you need to know about retaining wall ideas, materials, drainage, and construction so you can tackle your project with confidence.
Retaining Wall Materials and Styles
One of the first decisions you’ll make is what to build with, and there are more options than most people realize. Each material has its own strengths, cost range, and skill requirements. Knowing the differences upfront saves you a lot of headaches — and money — later on.
Interlocking Concrete Blocks
This is the material I recommend to most DIYers, and it’s the most popular choice for good reason. Interlocking concrete blocks are engineered to stack with a built-in batter (backward lean), they’re available at every home improvement store, and they come in a massive variety of colors, textures, and profiles. You don’t need mortar. The weight and interlocking design do the work. For anything under four feet, a motivated homeowner can handle this over a weekend with the right prep work.
Natural Stone
Natural stone walls are stunning — dry-stacked fieldstone or cut limestone can look like they’ve been part of the landscape for a hundred years. But they’re expensive, heavy, and require real skill to stack correctly. If you’re not experienced with stonework, I’d recommend hiring a mason for anything structural. For decorative low borders, it’s more forgiving.
Timber and Landscape Ties
Pressure-treated timber and railroad ties are the cheapest retaining wall option and the easiest to work with basic tools. The downside is lifespan — even treated wood will rot eventually, typically within 15 to 20 years depending on your climate and drainage. I’ve used timber walls for raised beds and low garden borders, but I wouldn’t rely on them for anything over two feet tall or in a high-moisture environment.
Poured Concrete
For serious height, heavy surcharge loads, or commercial applications, poured concrete is the gold standard. These are engineered walls — you’ll need plans, permits, and in most cases a contractor. Not a DIY project for most homeowners, but worth knowing about when your situation calls for it.
Boulder Walls
Large natural boulders placed with excavation equipment create an incredibly organic, rugged look that suits wooded lots and steep hillsides perfectly. The boulders themselves are relatively affordable if you’re near a quarry, but equipment rental and placement skill drive the cost up. For slopes with a natural aesthetic, this is one of my favorite retaining wall ideas.
If you’re working on a smaller decorative border or garden edge and want the look of natural stone without the weight and expense, the Landical 8 Pcs Imitation Stone Garden Fence, Faux Stone Retaining Wall Look Garden Bricks Border is a product I’ve genuinely been impressed with. These 17.3 x 12.6 inch gray plastic edging blocks mimic the look of stacked stone and push directly into the ground with included stakes — no digging, no mixing, no heavy lifting. What sets them apart is the realistic faux stone texture, which looks far more convincing in person than photos suggest. I used a set of these to border a small raised flower bed alongside a real block wall, and the visual continuity was excellent. For purely decorative low borders where you want the aesthetic of stone without the structural commitment, these are a smart, budget-friendly option.
When You Can DIY vs. When You Need an Engineer
This is the section most people skip, and it’s the one that matters most from a safety and legal standpoint. I’ll be direct with you: retaining walls hold back enormous amounts of soil, and when they fail, they can fail suddenly and catastrophically.
Under 4 Feet: Generally DIY-Friendly
Most municipalities allow homeowners to build retaining walls under four feet in height without permits or engineering, though you should always check your local codes before you start. At this height, proper material selection, a solid compacted base, and good drainage are enough to build a wall that will last. Follow the manufacturer’s guidelines for your block system and don’t skip the drainage — more on that below.
Over 4 Feet: Permits and Engineering Required
Once you go over four feet — or in some jurisdictions, over three feet — most areas require a building permit and, in many cases, stamped engineering drawings. This isn’t bureaucratic red tape; it’s a real safety threshold. Taller walls face exponentially greater soil pressure, and the consequences of failure are much more serious. If you’re stacking multiple shorter terraced walls to avoid this, note that many codes measure the combined height of tiered walls within a certain horizontal distance. Don’t try to game the system — get the permit.
Surcharge Loads Change Everything
Even a short retaining wall can require engineering if there’s a surcharge load above it — meaning a driveway, parking area, structure, or anything else adding weight to the soil behind the wall. If your wall is supporting anything beyond natural grade, consult with a structural engineer before you build. This is non-negotiable in my book.
Before any wall goes up, I always lay weed barrier fabric behind and beneath the gravel backfill zone to prevent roots and vegetation from compromising drainage over time. After testing several options, the LAVEVE 4FT x 100FT Weed Barrier Landscape Fabric is the one I keep coming back to. It’s a 3.2oz heavy-duty ground cover that’s permeable enough to let water pass through — which is critical behind a retaining wall — while blocking weed growth that can eventually push through gravel beds and compromise your drainage system. The 4×100 foot roll gives you plenty of material for a full wall run without splicing, and the weight of the fabric holds it in place during backfilling. This is a practical, unglamorous product that does exactly what it promises.
How to Build a Block Retaining Wall
Here’s the process I follow for a standard interlocking concrete block retaining wall. This is the method I’d call the definitive answer to how to build a retaining wall that actually lasts — and it starts well before the first block is set.
Step 1: Excavate the Trench
Dig your trench approximately 6 inches deep and 24 inches wide along the wall line. The first course of block will be buried — this is your foundation and it’s not optional. Wide enough to accommodate gravel backfill behind the first course from day one.
Step 2: Compact a Gravel Base
Add 4 to 6 inches of crushed gravel (not pea gravel — angular crushed stone compacts better) and tamp it thoroughly with a plate compactor. Rent one — hand tamping is not sufficient. A soft or uneven base is the number one cause of wall movement and failure at the base course.
Step 3: Set and Level the First Course
I cannot overstate this: the first course determines everything. Every block above it follows. Use a 4-foot level constantly, check front-to-back and side-to-side, and take your time. Tap blocks into adjustment with a rubber mallet. If the first course isn’t perfect, nothing above it will be either.
Step 4: Stack with Staggered Joints and Setback
Offset each course by half a block length, just like bricklaying. Most interlocking block systems are designed to set back slightly with each course — this backward lean (batter) is intentional and critical to stability. Follow the manufacturer’s specified setback per course religiously.
Step 5: Backfill with Gravel and Install Drainage Pipe
As you build up each course, backfill immediately behind the wall with clean crushed gravel — not native soil. At the base of the wall, lay a perforated drain pipe (sock-wrapped to prevent clogging) and run it to a daylight outlet at the end of the wall. This system is what keeps hydrostatic pressure from destroying your wall over time.
Step 6: Deadmen and Geogrids for Taller Walls
For walls over three feet, you need geogrids — polymer mesh that extends back into the compacted soil behind the wall and ties the whole system together. Most block manufacturers include geogrid placement specifications with their systems. Follow them. For timber walls, deadmen (horizontal timbers extending back into the slope) serve the same anchoring function.
For defining the finished edge of your planting areas adjacent to the wall — where mulch meets lawn — I’ve had great results with the RTS Home Accents Rock Lock Interlocking Landscape Edging and Border System. Each pack covers four feet with straight sections and includes ground spikes, and the interlocking design means you can run long clean lines without gaps or shifting. What I appreciate most is the rigidity — this edging holds its position under mulch and soil pressure without popping out or curling the way cheaper plastic edging does. After building a block retaining wall, pairing it with a clean, defined bed edge completes the look and keeps maintenance minimal year after year.
The #1 Retaining Wall Failure: Poor Drainage
I’ve seen a lot of DIY retaining walls fail, and the cause is almost always the same: water. Specifically, water that had nowhere to go and built up behind the wall until the pressure exceeded what the structure could handle. This is called hydrostatic pressure, and it’s more powerful than most people imagine. A cubic foot of saturated soil weighs significantly more than dry soil, and when that weight has no drainage outlet, it pushes — hard — against whatever is holding it back.
The drainage system behind a retaining wall isn’t optional and it isn’t a nice-to-have. It is the single most important element of the entire build. The recipe is straightforward: weed fabric against the native soil, a minimum 12-inch wide column of clean crushed gravel behind every course of block, a perforated drain pipe at the base running to a free outlet, and weep holes every 6 to 8 feet if you’re building a solid-face wall without natural gaps. Every element works together. Skip any one of them and you’re relying entirely on the wall structure to handle pressure it was never designed to bear alone.
The weed barrier fabric I use to separate native soil from gravel backfill is the FEED GARDEN 4FT x 100FT Landscape Fabric Weed Barrier, which comes as two 4×50 foot rolls with 30 U-shaped stakes included. The 3.2oz geotextile weight is important here — it’s heavy enough to prevent fine soil particles from migrating into your gravel drainage zone (which would eventually clog it) while still being permeable to water flow. That distinction matters a lot behind a retaining wall, where you want water moving through freely but soil staying put. The included stakes make it easy to pin the fabric in place while you backfill, which is genuinely helpful when you’re working alone. This is the product I reach for on every drainage project now.
One more drainage point worth emphasizing: surface water management above the wall matters too. Grade the soil behind the wall to direct surface runoff away from the structure, and consider a swale or French drain upslope if you’re dealing with significant water volume. The best-built retaining wall in the world will struggle against an unmanaged volume of surface water flowing directly into the backfill zone every time it rains.
Final Thoughts
A well-executed retaining wall is one of the most satisfying outdoor projects you can take on. Whether you’re exploring simple retaining wall ideas for a garden border or planning a full slope-management build, the principles are the same: start with the right material for your situation, never skip the drainage, get permits when the height demands it, and take your time on that first course. The structural work is straightforward once you understand why each step matters. Do it right, and you’ll have a wall that holds for decades — and a yard that finally works the way you always wanted it to.
