The one conversation that consistently saves my clients money long-term is when I talk them up from the entry-level material option. The price difference between mid-grade and budget on a patio, a deck, or a retaining wall is usually 15–20%. The difference in service life is often ten years. That math is almost always obvious in hindsight. Flagstone paths are one place where that principle actually flips — done right, flagstone is the mid-grade choice that performs like a premium one — and after overseeing enough outdoor builds to know what holds up through freeze-thaw cycles and heavy foot traffic, I want to walk you through exactly how a homeowner can execute this the way a crew would, without the crew’s invoice.
My wife stood on the porch, coffee in hand, watching a stranger fork-lift what appeared to be a small mountain of rock into our backyard. She looked at me. She looked at the stone. She looked back at me. “So,” she said slowly, “are we building a path or a fortress?” Reader, we nearly built both. But after a lot of deep breaths, two weekends, and a truly humbling amount of physical labor, that ridiculous mistake turned into the most beautiful thing in our backyard — and honestly? I’d do it again. (Except for the part where I pulled something in my back. I would not do that again.)
Why a DIY Flagstone Garden Path Is Worth Every Bit of Effort
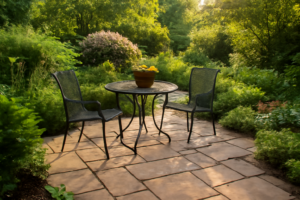
Before we get into the how, let me make a quick case for why this project is one of the best outdoor upgrades you can do on a budget. A professionally installed flagstone path can run anywhere from $15 to $30 per square foot once you factor in labor. Do it yourself, and your material costs drop dramatically — my path ended up being roughly 40 feet long and cost me just under $200 in stone, sand, and supplies (not counting the extra 720 pounds I had to figure out what to do with, but let’s move on). The visual payoff is enormous. Natural stone has a warmth and permanence that stamped concrete just can’t replicate, and a well-laid path genuinely transforms a backyard from a yard into an outdoor living space.
Planning Your Path Before You Touch a Single Stone
The number one mistake most DIYers make — besides ordering ten times the stone they need, hypothetically — is skipping the planning phase. Here’s how to do it right:
Map the Route First
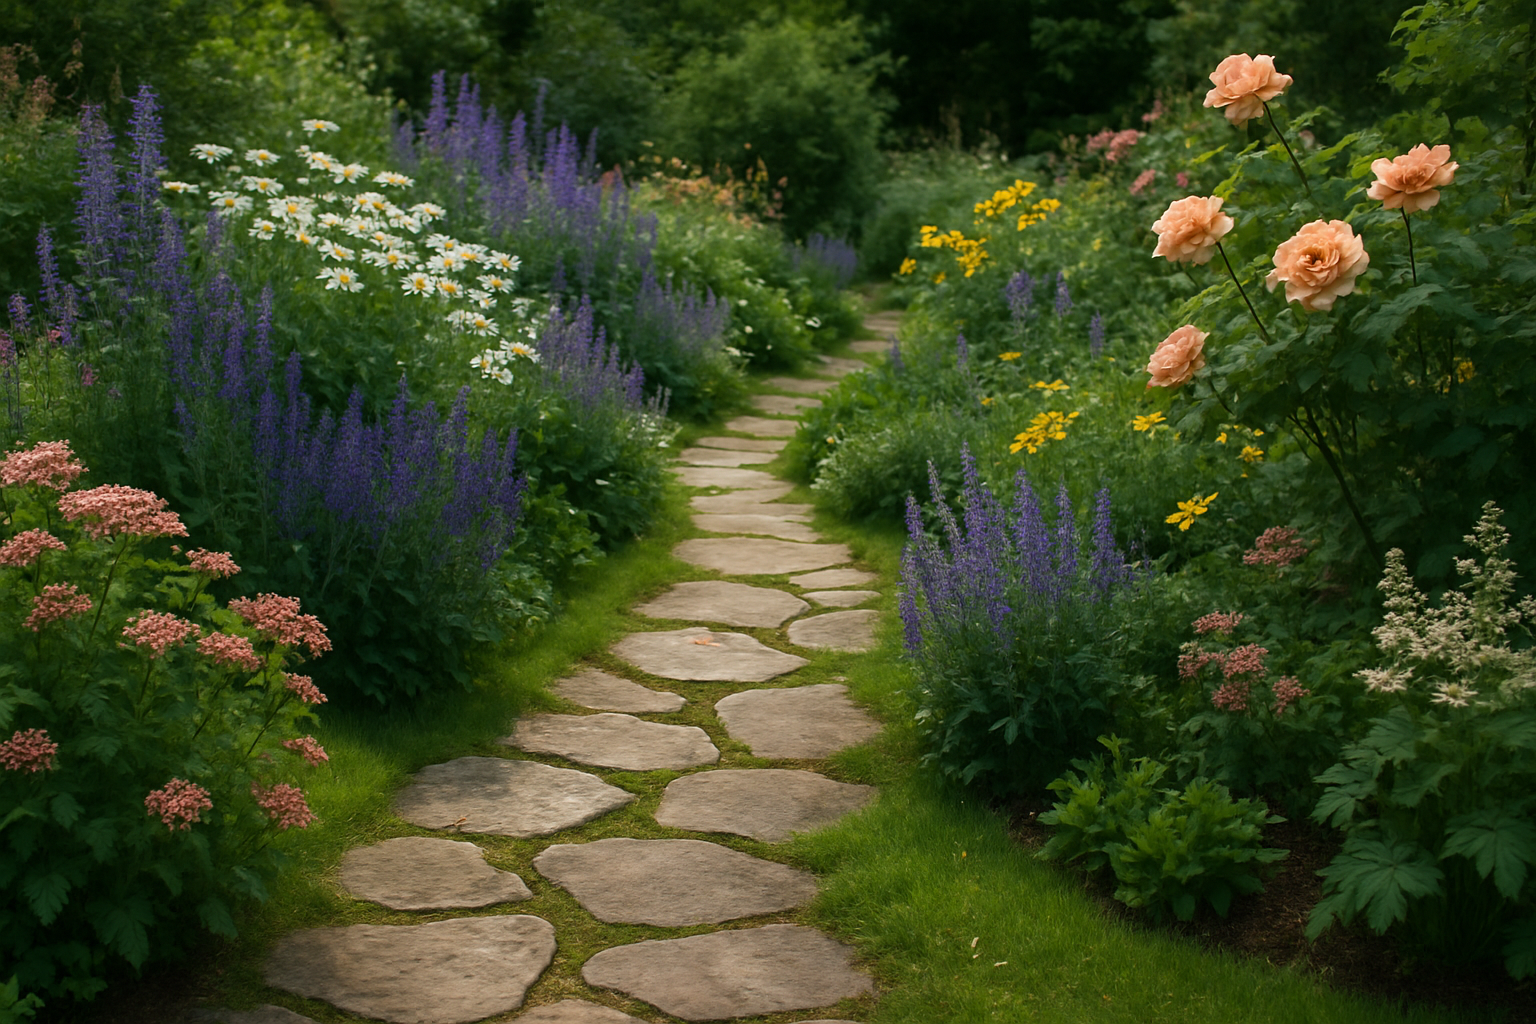
Grab a garden hose and lay it out along the ground where you want your path to go. Curved paths feel more natural and organic; straight paths feel more formal and structured. Walk it a few times. Does it feel like the path you’d actually use, or are you already cutting corners across the lawn? Adjust until it matches your instincts, then mark the edges with spray paint or landscape flags.
Calculate Your Stone (Carefully — Learn From My Pain)
Measure your path length and width. Multiply those numbers to get your square footage. For a typical stepping stone path with gaps, you’ll cover roughly 60–70% of the ground surface with stone. Add 10% for waste and breakage. Write this number down. Read it again. Then place your order. Trust me on this.
Choose the Right Depth of Excavation
For a dry-laid flagstone path on a residential lawn, you’ll want to excavate about 4 to 6 inches deep. This gives you room for a 2–3 inch compacted gravel base, a 1-inch layer of coarse sand, and then your stones sitting flush with or just slightly above grade. Proper excavation is what keeps your stones from shifting, sinking, or creating trip hazards down the road.
Step-by-Step: How to Lay the Path
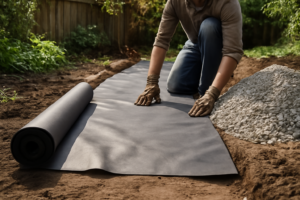
Step 1 — Excavate and Compact
Dig out your marked path to the appropriate depth. Remove all grass and roots. Add a layer of crushed gravel (Class II base rock works great) and compact it down with a hand tamper or plate compactor. This base layer is everything — it’s what gives your path its stability and drainage. Don’t skip it, don’t rush it.
Step 2 — Lay Your Sand Bed
Add about an inch of coarse builder’s sand over the gravel base. Use a screed board to level it out. This sand layer lets you make fine adjustments to each stone’s height and keeps things from wobbling once set.
Step 3 — Place Your Stones
Start at one end and work your way to the other, fitting stones together like a loose puzzle. Aim for gaps of about 1–2 inches between pieces. Set each stone, press it down firmly, and wiggle it slightly so it seats into the sand. Use a rubber mallet to tap it level. Check with a level or simply step on it — it should feel completely solid with no rocking. For the most natural, organic look, alternate larger and smaller pieces and don’t be afraid of irregular shapes.
Step 4 — Fill the Joints
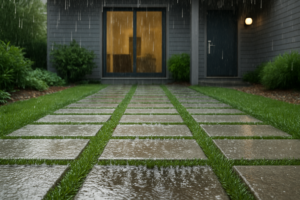
Once all your stones are placed and level, it’s time to lock everything in. This is where polymeric sand becomes your best friend. Sweep it into the joints between stones, mist the entire surface with water, and it activates a binding agent that hardens the sand and prevents weeds, ants, and erosion from undoing all your hard work. This step alone adds years to the life of your path.
What I Used: My Recommended Products
Whether you’re sourcing natural stone locally or want convenient, ready-to-go options delivered to your door, here are the products I’d recommend for building your own beautiful path:
- For a budget-friendly, no-heavy-lifting option: The TierraVerde 4-Pack 18″x22″ Natural Rock Rubber Stepping Stones are a fantastic alternative if you want the look of real stone without hauling hundreds of pounds. These non-slip faux flagstone pieces are perfect for a casual garden path and look surprisingly realistic — great for renters or anyone who wants a weekend project without the excavation.
- For single statement stones: These irregular natural stepping stones are a beautiful 12″x16″ option for mixing into a garden bed or creating a simple stepping path across a lawn. The natural, jagged edges give that authentic flagstone look without a major installation.
- For an eco-conscious path: The Gardener’s Supply Flagstone Recycled Rubber Stepping Stone is made from recycled rubber, making it slip-resistant, durable, and gentle on the environment. I love this for garden
The Rubber Flagstones That Let Me Skip the Backbreaking Labor
Real flagstone is beautiful, but hauling 40-pound slabs and cutting them to fit is a one-way ticket to a sore back and a stalled project. If you want authentic flagstone aesthetics without the heavy lifting or excavation headaches, rubber stepping stones are the honest shortcut that actually delivers.
What works
- The molded texture genuinely looks like natural stone from standing distance—your neighbors won’t immediately assume “fake” when they see your path
- At 18″x22″, these pieces cover ground fast, and a 4-pack weighs a fraction of real flagstone, meaning you can lay a 20-foot path solo on a Saturday without help
- Non-slip surface stays grippy when wet, which matters way more in actual yard conditions than marketing usually admits
What doesn’t
- Up close, the rubber finish reads as rubber—if someone crouches down and really looks, they’ll know it’s not stone
- In direct sun, rubber can get noticeably hot underfoot in summer, and over years, UV exposure can fade the color unevenly
I’ll admit I hesitated before committing to rubber instead of the “real thing”—that nagging voice asking if visitors would judge the choice—but after laying them, I realized the finished look beat my expectations, and my knees thanked me. Grab the TierraVerde 4-Pack 18″x22″ Natural Rock Rubber Stepping Stones and knock out your path this weekend.
TierraVerde 4-Pack 18"x22" Natural Rock Rubber Stepping
I laid 20 feet solo in a Saturday without fake-looking seams showing up close.
Check Price on Amazon →This post contains affiliate links. As an Amazon Associate, I earn from qualifying purchases at no extra cost to you.