- DIY Retaining Wall – Block Walls Guide — Essential reading before you touch anything
- UFGS 32 32 23: Segmental Concrete Block Retaining Wall — Industry-level specs for understanding proper construction
- Stone Master Molds Rubber Retaining Wall Cap Mold
This post contains affiliate links. As an Amazon Associate, I earn from qualifying purchases.
The first thing I look at on any property isn’t the plants, the patio, or the lawn — it’s where the water goes. In landscape design, water always wins. Every single outdoor living problem I’ve been hired to fix traces back to drainage someone ignored when the original work was done. Retaining walls are where I see this play out the most dramatically — a wall that looks structurally fine on day one can quietly fail over years as hydrostatic pressure builds behind it with nowhere to escape, and by the time a homeowner notices the lean, most contractors will tell them the only fix is a full rebuild. It often isn’t. In this post, I’m walking through exactly what I’ve seen work in the field when a retaining wall starts to move, because the right intervention at the right time can be the difference between a weekend project and a five-figure construction job.
Spoiler: I saved the yard. For about $200 in materials and two weekends of work. And I want to tell you exactly how I did it — because if you’re staring at a bulging, cracked, or leaning retaining wall right now, you may not need to panic the way I did.
Why Retaining Walls Fail (And Why Contractors Don’t Always Tell You the Real Reason)
Here’s what none of those contractors explained to me during their walkthroughs: most retaining wall failures aren’t structural collapses waiting to happen. They’re drainage problems. Water builds up behind the wall, the pressure increases, and over time the wall starts to bow outward or the blocks begin to shift and separate. In my case, the original builder had either skipped the gravel backfill or used too little of it, and after seven years of rainstorms, the saturated soil was pushing my wall forward inch by inch.
Once I understood the actual cause, the solution became a lot clearer. I didn’t need to tear out the wall. I needed to relieve the hydrostatic pressure behind it, reset the shifted blocks, and make sure the drainage was working properly going forward. That’s a very different — and much cheaper — project.
DIY Retaining Wall Repair: What the Process Actually Looks Like
Before I touched a single block, I spent a few evenings reading everything I could get my hands on. One resource that genuinely helped me understand the engineering side was DIY Retaining Wall – Block Walls, a guide that walks you through planning and building segmental concrete block walls step by step. Even though I wasn’t rebuilding from scratch, understanding the correct way a wall should be constructed helped me diagnose exactly where mine had gone wrong. Knowledge really is half the battle here.
For a more technical deep dive into materials and construction standards, I also referenced UFGS 32 32 23: Segmental Concrete Block Retaining Wall, which outlines industry specifications. It’s dry reading, but if you want to understand what “correct” actually looks like, it’s worth the effort.
Here’s the repair process I followed, broken down simply:
- Assess the damage honestly. Walk the length of the wall and mark every block that has shifted more than half an inch, every crack wider than a quarter inch, and any spots where the wall is visibly bowing outward. If more than 30–40% of your wall is compromised, a full rebuild may genuinely be the better call.
- Excavate behind the problem areas. I rented a small tiller for $45 and carefully dug out the soil behind the worst sections — about 12 inches back from the wall face. This is where I found the issue: almost no gravel, just compacted clay sitting directly against the blocks.
- Add drainage. I laid a perforated drain pipe along the base of the wall and packed in clean crushed gravel before backfilling. This single step is what makes the repair last.
- Reset shifted blocks. I removed the displaced blocks, cleaned the base layer, checked it with a level, and re-laid each course with construction adhesive between layers for added stability.
- Address any cosmetic damage. A few of my blocks were chipped or faded badly. More on that below.
Making It Look Good Again: The Part I Wasn’t Expecting to Enjoy
Once the structural work was done, I turned my attention to the cosmetic side — and honestly, this became my favorite part of the whole project. Several blocks along the top course were cracked or had chipped corners, and I didn’t want to pay contractor prices for replacement blocks that might not even match my existing wall color.
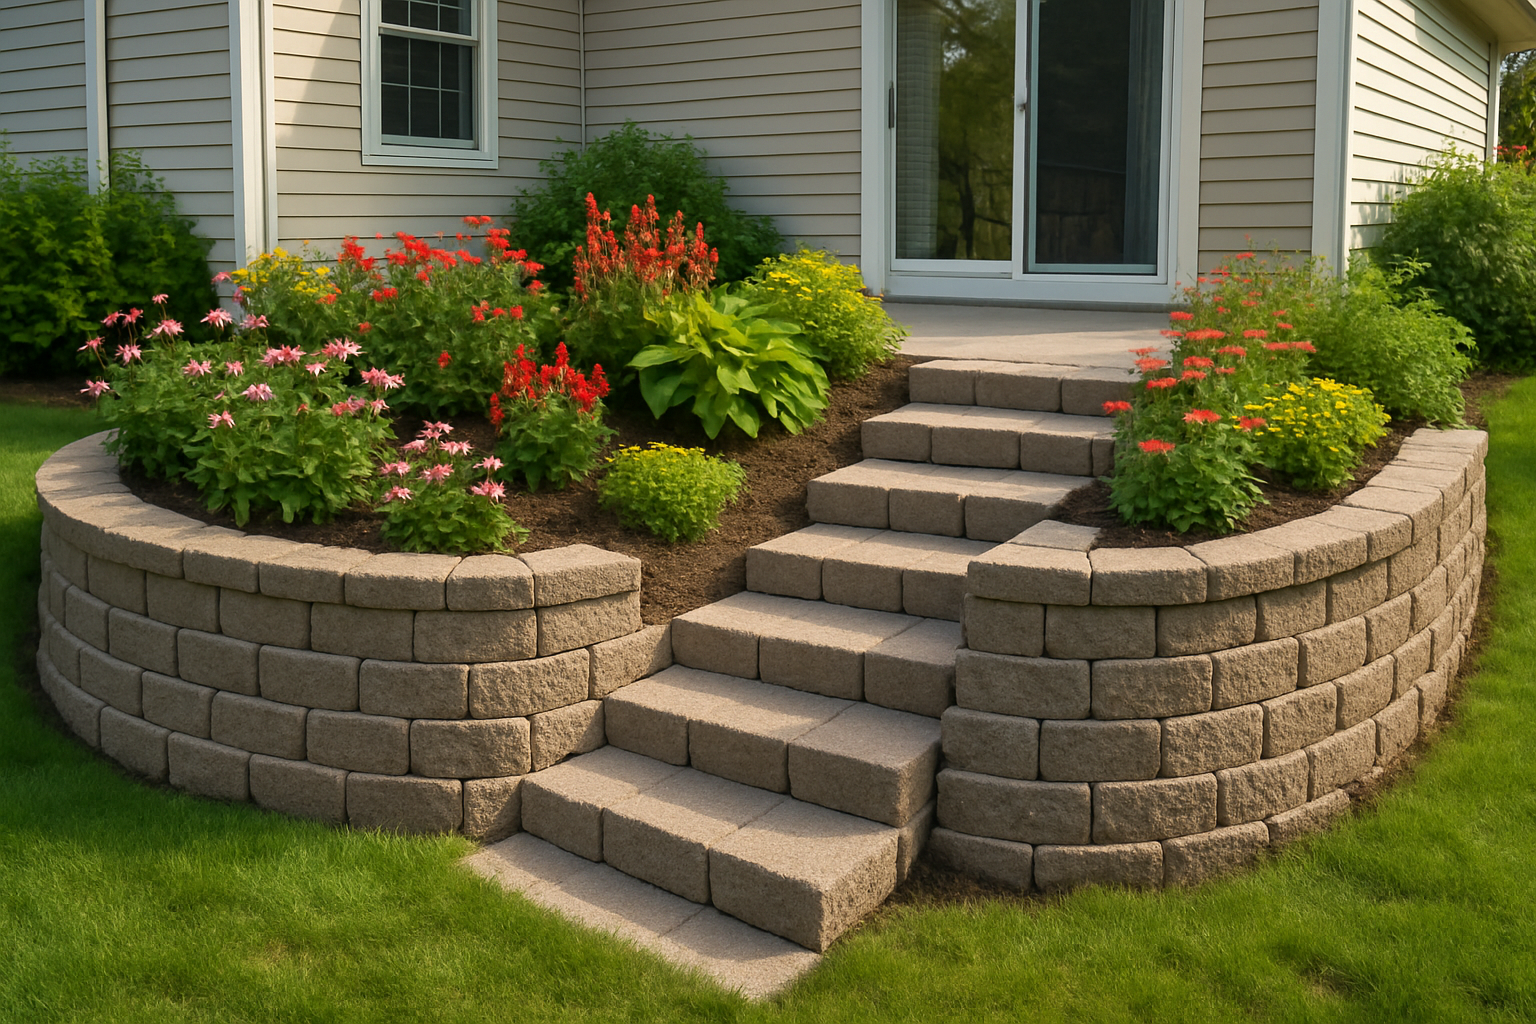
Instead, I picked up the Stone Master Molds Rubber Mold for Retaining Wall Caps — a flexible rubber mold that lets you pour your own concrete cap blocks at home. The dimensions (17.5″ wide at the front, 14″ at the back, 3.75″ deep) were a nearly perfect match for my existing wall profile. I mixed a bag of concrete, poured it into the mold, let it cure for 48 hours, and had custom cap blocks for a fraction of retail cost. I was honestly giddy.
For the face of a few damaged mid-wall blocks, I used the Textured Face Retaining Wall Block Plastic Craft Mold Set to cast small patch pieces with a realistic stone texture. Once I painted them with a concrete stain to match the existing color, you genuinely cannot tell the difference unless you know exactly where to look.
I also had two corner posts at the ends of the wall that had seen better days. I wrapped them with Maasechs Faux Stone Column Wraps with Post Caps in gray, and the transformation was genuinely stunning. They look intentional and polished — like I upgraded the wall on purpose rather than repaired it out of desperation.
What I Used — My Recommended Products
- DIY Retaining Wall – Block Walls Guide — Essential reading before you touch anything
- UFGS 32 32 23: Segmental Concrete Block Retaining Wall — Industry-level specs for understanding proper construction
- Stone Master Molds Rubber Retaining Wall Cap Mold