Landscape lighting was the single best investment I made in my entire yard — and I’ve done a lot of projects over the years. I’ve repaved the driveway, built a pergola, and redesigned the garden beds twice. Nothing moved the needle the way outdoor lighting did. The first night I flipped that transformer switch and watched the trees glow, the walkway come alive, and the whole property feel like somewhere worth arriving at, I knew I’d waited too long. If you’re looking for outdoor lighting ideas that actually transform your space, this guide covers everything I’ve learned the practical way — through trial, error, and a few burnt-out fixtures.
This post contains affiliate links. As an Amazon Associate, I earn from qualifying purchases at no extra cost to you.
Types of Outdoor Lighting and Where to Use Each
Before you buy a single fixture, it helps to understand what each light type actually does. Mixing them correctly is what separates a professional-looking result from the “I stuck some solar stakes in the ground” look.
Path Lights
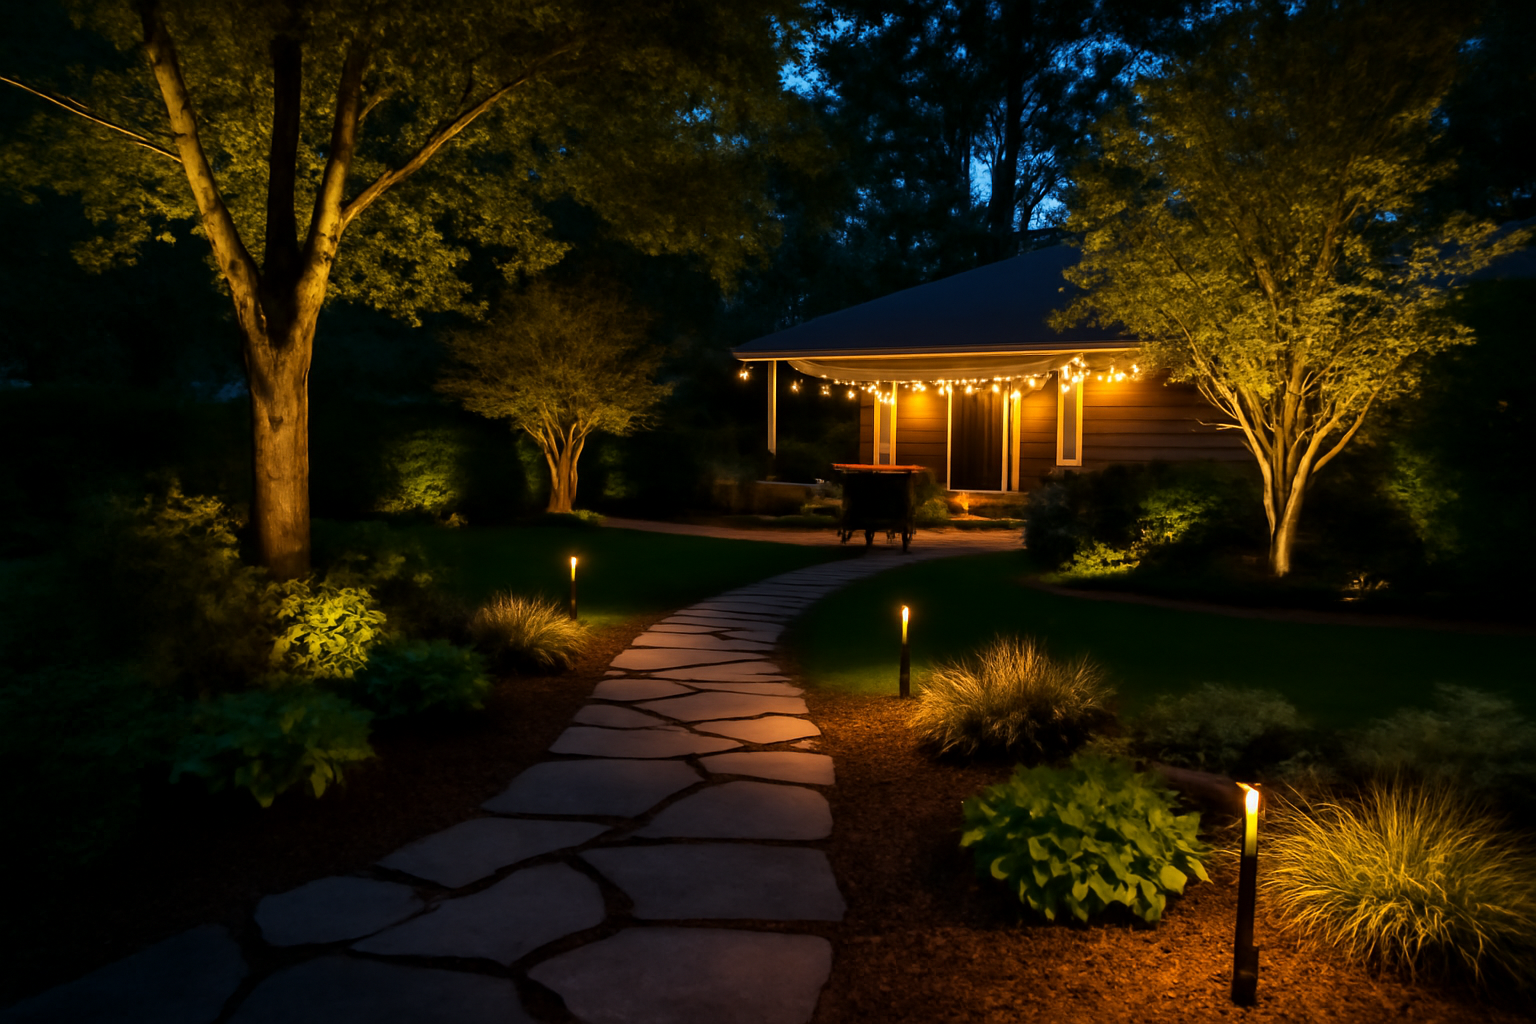
Path lights are the most recognizable outdoor lighting idea for residential yards. They line walkways, edge garden borders, and guide foot traffic safely after dark. The goal isn’t to illuminate the path like an airport runway — it’s to create gentle, repeating pools of light that define the route. Space them roughly eight to ten feet apart on alternating sides for the most natural effect.
Uplights
Uplights sit at ground level and shine upward. Use them at the base of mature trees, architectural columns, tall ornamental grasses, or the corners of your home’s facade. The upward angle creates drama and depth that’s hard to achieve any other way. Even a single uplight under a large oak can completely reframe how your yard reads at night.
Downlights (Moonlighting)
Downlights mounted high in tree canopies — a technique called moonlighting — produce the softest, most natural-looking outdoor lighting available. The light filters through the branches and casts moving shadows on the ground below, mimicking full moonlight. It takes a little more effort to install at height, but the result is stunning and unlike anything else in the landscape lighting toolkit.
Accent and Spot Lights
Accent lights and spotlights are your precision tools. Point them at a water feature, a boulder, a sculpture, a specimen shrub — anything that deserves a dedicated moment in the dark. These are the lights that create focal points and give your yard a sense of intentional design rather than just “lit up.”
String Lights
String lights belong on patios, under pergolas, and over outdoor dining areas. They create ambient warmth that no other fixture can replicate for entertaining spaces. They’re not landscape lighting in the traditional sense, but they’re essential for making an outdoor room feel finished and inviting.
Step Lights
Step lights are built into risers, deck edges, or retaining walls. They’re as much about safety as aesthetics — anyone who has stumbled on an unlit step at night understands the value immediately. Recessed step lights are nearly invisible during the day and provide clean, low-profile illumination after dark.
Solar vs Low-Voltage vs Line Voltage
The power source you choose affects cost, performance, longevity, and how much work the installation actually requires. Here’s my honest breakdown after using all three.
Solar
Solar lights are the easiest entry point — no wiring, no transformer, no electrician. You push them in the ground and they work. The tradeoff is consistency. Output varies with cloud cover and season, and most solar path lights need replacing every two to three years as the batteries degrade. That said, for casual path lighting or garden borders where you don’t need precision, solar is a perfectly reasonable choice.
For a solar option that punches above its price point, I keep coming back to the Greluna Solar Lights Outdoor 12 Pack. The auto on/off feature means zero maintenance involvement — they handle themselves at dusk and dawn — and the 3000K warm white tone avoids that cold bluish glow that makes cheaper solar lights look out of place in a residential yard. I’ve tested a lot of solar path lights, and the Greluna set is the one I’d actually recommend to a neighbor for a low-effort garden border.
If you want something with a more premium aesthetic in the solar category, the Mancra Solar Pathway Lights 8 Pack stand out immediately. The glass and metal construction looks genuinely elegant in a way that plastic solar stakes simply don’t. They read as intentional design choices rather than budget fill-ins, and the 3000K output keeps the tone warm and cohesive with the rest of your outdoor lighting. I used a set of these along a flagstone path and got compliments before I even finished the rest of the install.
Low-Voltage (12V)
Low-voltage landscape lighting is the professional standard and my personal go-to for anything I want to last. Running at 12 volts, it’s safe to handle and wire yourself — no licensed electrician required in most jurisdictions. The output is consistent year-round, the fixtures last for years, and the system is expandable whenever you want to add more zones. This is the system I’d recommend to anyone serious about their outdoor lighting ideas.
The kit I used on my front yard redesign — and the one I genuinely recommend to anyone starting fresh — is the SUNVIE All-in-One LED Low Voltage Landscape Lighting Kit, 12-Pack. What makes it stand out is that it comes with the transformer, 100 feet of wire, and the connectors — everything you need in one box. The 3000K color temperature is warm and residential-appropriate, and the waterproof construction has held up through two full winters without any issues on my end. For someone who wants a complete low-voltage system without sourcing components separately, this is the most straightforward path forward.
Line Voltage (120V)
Line voltage fixtures are hardwired into your home’s electrical system and are typically reserved for permanent architectural fixtures — wall sconces, post lights at the driveway entrance, or security floods. Because they run at full household voltage, installation requires a licensed electrician. The payoff is maximum brightness and fixture longevity, but for most landscape lighting applications, low-voltage does the job better with far less complexity.
How to Plan Your Outdoor Lighting Layout
The Layering Principle
Good outdoor lighting design uses three layers: ambient (general illumination), task (functional light for walkways and stairs), and accent (focal points and drama). Most DIY installs skip the accent layer entirely and end up with something that’s functional but flat. All three layers working together is what makes a yard feel professionally lit.
Light the Boundaries, Not the Center
A common mistake is flooding the middle of a lawn with light. The eye is actually more interested in edges — where the garden meets the grass, where the house meets the landscape, where the path meets the planting bed. Lighting the perimeter creates depth and makes a space feel larger. The center takes care of itself with ambient spillover.
Less Is More — Avoid the Runway Look
Over-lighting is the most common outdoor lighting mistake homeowners make. Path lights spaced too closely, or too many uplights competing for attention, creates visual noise rather than atmosphere. When in doubt, use fewer fixtures and let the shadows do some work. The contrast between light and dark is where the magic lives.
Color Temperature: Always Warm White
For residential outdoor lighting, 2700K to 3000K warm white is the only choice worth considering. Cool white (4000K and above) looks clinical and institutional against natural materials like wood, stone, and plants. Every fixture I’ve recommended in this guide sits in the warm white range for exactly this reason.
DIY Low-Voltage Lighting Installation
Installing a low-voltage landscape lighting system is one of the more satisfying weekend projects you can take on. Here’s the practical breakdown of how to do it right.
Transformer Sizing
Add up the wattage of every fixture you plan to run, then size your transformer to about 25% more capacity than that total. A 150-watt transformer running 120 watts of fixtures is comfortable. Running it at full load shortens the transformer’s lifespan and leaves no room to expand later.
Wire Runs and Voltage Drop
Voltage drop is the enemy of consistent output on long wire runs. Keep individual runs under 100 feet where possible, use 12-gauge wire for runs over 50 feet, and consider a hub-and-spoke wiring layout rather than daisy-chaining all your fixtures in series. The fixtures at the end of a long daisy chain will always be dimmer than those near the transformer.
Connection Techniques
Most low-voltage systems use push-in or snap-on connectors that pierce the wire insulation — no stripping required. Make sure connectors are fully seated and waterproofed. Loose connections are the number one cause of flickering and failed fixtures in DIY low-voltage installs.
If you want a kit specifically suited for combining path lights and spotlights in one cohesive system, the SUNVIE LED Low Voltage Landscape Lighting Kit, 12 Pack is worth a close look. It includes both pathway lights and spotlights along with the connectors you need, all built from aluminum for durability. I appreciate that the aluminum construction resists corrosion in a way that plastic housings simply don’t over multiple seasons. If you’re planning a layout that needs both fixture types — and most yards do — getting them from the same kit ensures the output and color temperature stay perfectly matched across your whole system.
Final Tips Before You Flip the Switch
- Walk your yard at night with a flashlight before finalizing fixture placement — you’ll see angles and shadows you can’t predict in daylight.
- Set your transformer timer to shut off by midnight. Lights running all night wear out faster and annoy neighbors.
- Leave extra wire coiled underground at each fixture location so you can reposition them without re-running cable.
- Take photos of where your wire runs are buried before you landscape over them.
Outdoor lighting ideas are easy to find — the internet is full of them. What’s harder to find is honest, practical guidance on what actually works once you’re standing in your yard with a transformer in one hand and a roll of wire in the other. Start with low-voltage, layer your light sources, keep the color temperature warm, and resist the urge to over-light. Do those four things and your yard will look better after dark than most professionally landscaped properties in your neighborhood. It really is that transformative.