This post contains affiliate links. As an Amazon Associate, I earn from qualifying purchases at no extra cost to you.
Let’s be honest — when most people hear “concrete patio,” they picture a gray slab behind a 1970s ranch house with a lawn chair and a bag of charcoal on it. Concrete has a reputation for being the boring, budget default. But after spending years renovating outdoor spaces, I can tell you that modern concrete patio ideas have completely changed that conversation. Today’s concrete patios can mimic high-end stone, take on rich earthy colors, and pull off geometric patterns that look like something out of an architectural magazine. And the best part? You can do it for a fraction of what natural materials cost. Whether you’re starting from scratch or refreshing an existing slab, this guide covers everything I’ve learned the hard way — so you don’t have to.
Concrete Patio Design Options
One of the biggest surprises for homeowners who start researching concrete patio ideas is just how many finish options exist. This isn’t a one-size-fits-all material anymore. Here’s a breakdown of the main styles I’ve worked with and what each one is best suited for.
Plain Broom-Finished Concrete
This is the classic — freshly poured concrete dragged with a stiff broom to create a slightly textured surface. It’s the cheapest option, it drains well, and when it’s done right with clean edges and proper control joints, it looks genuinely sharp. Don’t underestimate it. A well-poured broom-finished slab with a crisp border and a good sealer looks intentional, especially in modern or minimalist yard designs.
Stamped Concrete
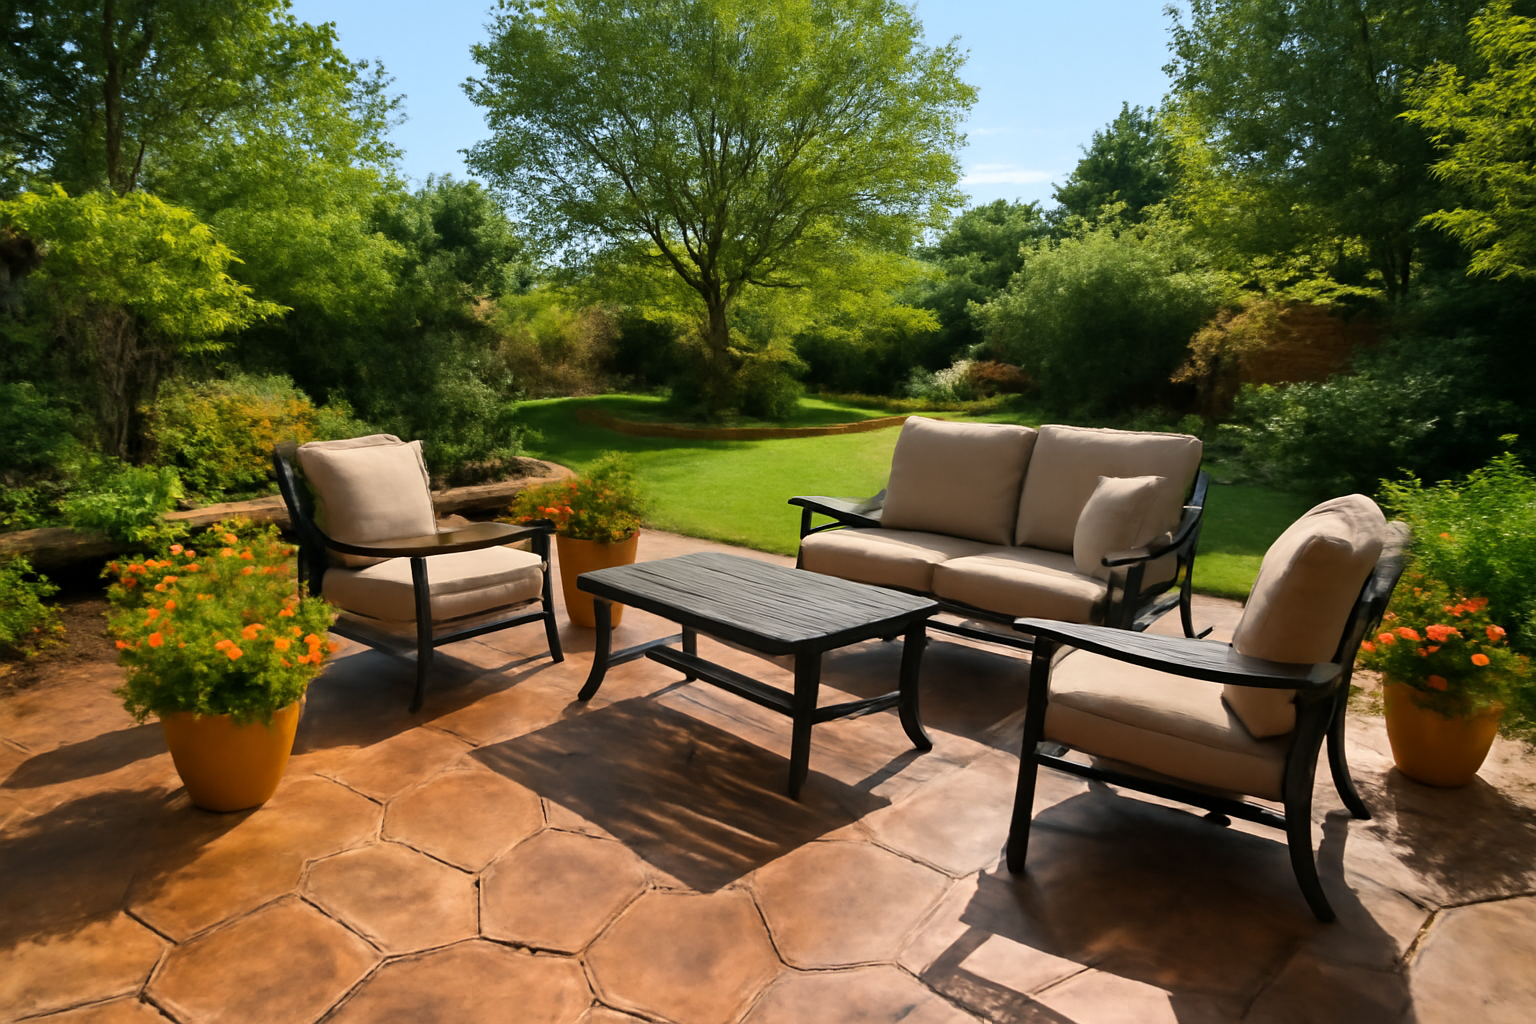
This is where things get exciting. A stamped concrete patio uses textured mats pressed into freshly poured concrete to mimic the look of flagstone, slate, brick, cobblestone, and even wood. Combined with integral color or surface stains, a stamped concrete patio can fool even experienced eyes from ten feet away. The big win here is cost — you get a high-end look for roughly one-third the price of real stone or pavers. The trade-off is that you really do need an experienced contractor for the pour, because timing is everything when stamping. One dry spell or one slow crew and the pattern comes out muddy.
Stained Concrete
Staining is my personal favorite concrete patio idea for homeowners who want to add character to an existing slab without tearing it out. Acid stains react chemically with the concrete to create marbled, variegated tones — mostly earthy browns, tans, and terra cottas. Water-based stains give you a much wider color palette and are more beginner-friendly. The key is surface prep: clean, open concrete absorbs stain evenly. Any sealer residue, grease, or paint and you’ll end up with blotchy results.
For staining projects, I’ve had great results with the Concrete Resurrection Brand Concrete Stain Concentrate in Mocha Medium Brown. What I like about it is the concentrate format — you mix it with water yourself, which means you control the intensity of the color. A lighter mix gives you a subtle warm tint, and a stronger mix gets you a deep, rich brown that transforms a plain slab completely. It’s semi-transparent, so the natural variation in the concrete still shows through, which actually makes it look more like natural stone than a painted surface. I used this on a 400-square-foot slab and got great coverage out of a single 32-ounce bottle. Eco-friendly formula is a bonus if you’re working near a garden.
If you prefer a bolder, more uniform color with a durable protective finish built right in, the Polar Dark Grey Concrete Stain is worth a serious look. It’s a solvent-free coating that delivers a smooth, stain-resistant, and slip-resistant finish — which matters a lot on a patio that’s going to get wet. The dark grey tone gives outdoor spaces a modern, clean aesthetic that pairs especially well with contemporary landscaping and dark outdoor furniture. I appreciate that it works on both interior and exterior surfaces, so if your patio connects to a garage or workshop floor, you can carry the look inside seamlessly.
Exposed Aggregate
Exposed aggregate concrete uses decorative stone, pebbles, or recycled glass mixed into the concrete. The top layer is washed away before it fully cures, leaving the stones visible on the surface. The result is a naturally textured, slip-resistant surface with real visual depth. It’s a great concrete patio idea for pool surrounds or areas that get a lot of rain. The finish is durable and hides dirt and surface wear better than plain concrete.
Scored and Saw-Cut Patterns
This one is underused and I genuinely don’t know why. After the concrete cures, you can use an angle grinder or concrete saw to cut geometric patterns directly into the surface — grid lines, diagonal squares, large-format tile looks, even borders and medallions. Combined with a stain, scored concrete looks incredibly intentional and high-end. It’s also one of the more DIY-friendly upgrades if you already have a plain slab you’re not happy with.
Concrete Patio Cost Breakdown
Here’s what I’ve seen contractors quote in my area, and what aligns with national averages. Keep in mind that site prep, demolition of existing materials, and region all affect final pricing significantly.
- Plain broom-finished concrete: $6–$10 per square foot installed
- Stamped concrete patio: $12–$18 per square foot installed
- Stained concrete: $8–$14 per square foot installed (less if you DIY the staining after the pour)
- Exposed aggregate: $10–$16 per square foot installed
- Scored/saw-cut patterns: Typically added for $1–$3 per square foot on top of base slab cost
Where can you realistically save money doing it yourself? Staining and sealing are both very DIY-friendly if you’re comfortable with surface prep and patient with application. Scoring is manageable if you rent the right tool and practice your lines. The actual pour — especially for anything stamped — is where I’d strongly recommend hiring a professional. A bad pour is expensive to fix and nearly impossible to fully hide.
Concrete vs Pavers: An Honest Comparison
I’ve installed both, and I’ll give you the straight version without trying to sell you on one or the other. They both have real advantages depending on your situation.
Where Concrete Wins
- Lower upfront cost — especially for large, flat areas
- Faster installation — one pour vs. laying hundreds of individual units
- No weeds growing through joints
- Cleaner look for modern and contemporary designs
- Better for very large patios where paver costs compound quickly
Where Pavers Win
- Freeze-thaw climates — individual pavers flex and heave without cracking the whole surface
- Repairs are easier — one cracked paver gets swapped out vs. patching a concrete slab
- Curves and organic shapes are much easier to achieve
- Traditional, cottage, or Mediterranean aesthetic
My honest take: if you’re in a stable climate and working with a rectangular or geometric space, a concrete patio will serve you just as well as pavers for significantly less money. If you’re in a zone that gets serious freeze-thaw cycles or you want a curved, flowing design, pavers are the smarter long-term investment.
How to Maintain a Concrete Patio
This is where I see homeowners drop the ball the most. A beautiful concrete patio that never gets sealed or maintained will look rough within five years. The good news is that upkeep is not complicated — it just needs to actually happen.
Sealing: Every 2–3 Years
Sealing is the single most important thing you can do for a concrete patio. A good penetrating sealer keeps water, oil, and freeze-thaw damage from working into the surface. For a natural-look sealer that doesn’t change the appearance of the concrete, I keep coming back to the DOMINATOR Concrete Sealer. It’s a water-based penetrating sealer that protects against water intrusion without leaving a shiny or plasticky film on top — the concrete just looks like clean, well-maintained concrete. It works on patios, pool decks, garage floors, and pavers, which makes it a versatile product to keep in the garage for ongoing maintenance. I applied it with a pump sprayer and a foam roller for edges, and the whole 400-square-foot patio took less than two hours including dry time checks.
For patios that deal with harsher weather conditions — heavy rain, UV exposure, de-icing salts — I recommend stepping up to the Bricks & Exterior Surfaces All Purpose Concrete Sealer. What stands out about this one is its all-weather protection formula — it’s specifically designed to handle moisture from multiple directions, which matters a lot if your patio is in a shaded area that stays damp or gets heavy seasonal rain. It works on concrete, stone, pavers, and driveways, so one gallon goes a long way if you’re maintaining multiple surfaces around the property. After testing several options over the years, this is the one I reach for when conditions are tough.
Pressure Washing
Pressure wash your patio once a year, ideally before resealing. Use a fan tip at 2,500–3,000 PSI and keep the wand moving — holding it in one spot too long can etch the surface or lift the sealer. Let the slab dry completely (at least 48 hours) before applying any new sealer or stain. Skipping this step and sealing over a damp surface is how you end up with a cloudy, peeling finish.
Crack Repair
Small hairline cracks are normal in concrete and mostly cosmetic. The problem is when water gets in, freezes, and expands — turning a hairline into a real structural crack. Address cracks early with a concrete crack filler or polyurethane caulk, then seal over it. Don’t wait until a 1/8-inch crack becomes a 1/2-inch gap. For cracks larger than a quarter inch, get a professional assessment before patching, because larger cracks can indicate settling or drainage issues underneath the slab.
Final Thoughts
A concrete patio done right is one of the best investments you can make in your outdoor space. It’s durable, versatile, and with the right finish — whether that’s a stamped concrete patio that looks like fieldstone or a stained slab in a rich warm tone — it genuinely holds its own against materials that cost two or three times as much. The concrete patio ideas available today give homeowners more creative control than ever, and the maintenance, when you stay on top of it, is about as simple as it gets. Seal it, wash it, fix cracks early. Do those three things and a well-installed concrete patio will look great for decades.
