When a client asks me to improve curb appeal, I always walk around to the backyard first. What’s happening behind the house tells me everything about how the property has been maintained, where the drainage problems are, and whether a cosmetic front fix is going to hold up or just paper over something structural. Nine times out of ten, the patio furniture is what gives it away — and resin wicker that’s gone chalky, brittle, or grey tells me the outdoor space has been neglected long enough that we’re not just talking about a cushion swap. Restoring resin wicker furniture properly is a legitimate skill, and because I’ve assessed hundreds of outdoor living spaces professionally and overseen more furniture restoration projects than I can count, I want to walk you through exactly how it’s done — the right sequence, the right products, and the mistakes that will cost you time and money if you skip them.
Assessing the Damage: What You’re Actually Working With
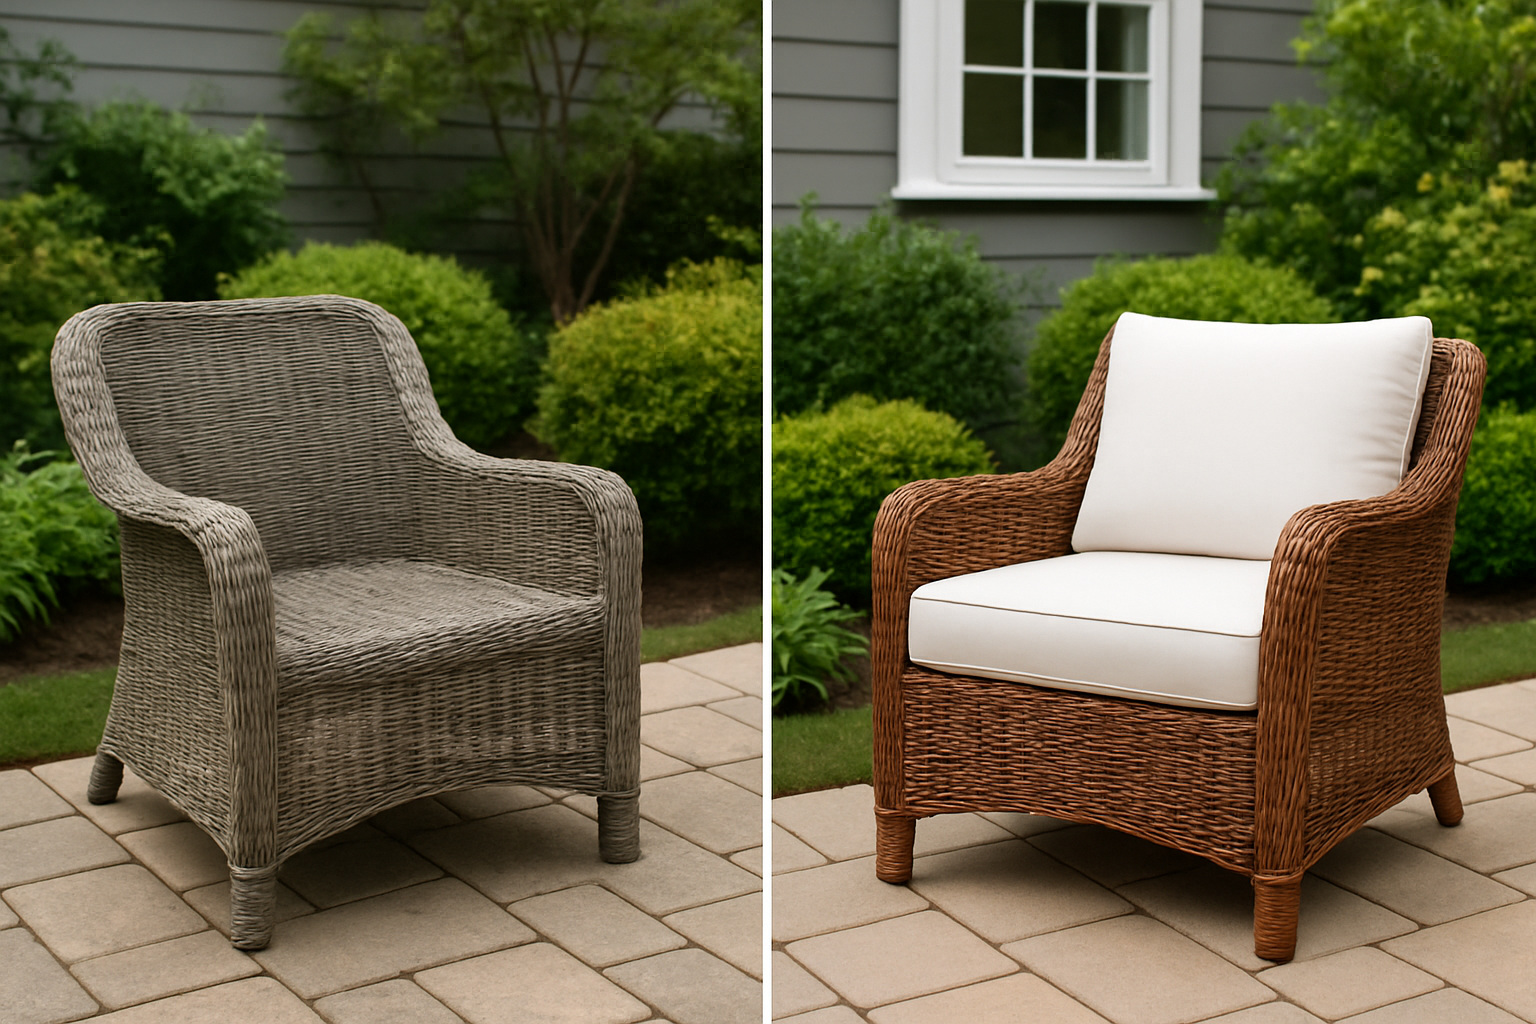
My resin wicker set — two chairs and a loveseat — had seen better decades. The weave had gone from a rich espresso brown to a kind of sad, sun-bleached gray. There was green algae creeping along the bottom runners, a fine layer of grime packed into every little wicker crevice, and I’m pretty sure a spider family had filed a homestead claim on the left armrest. Sound familiar? If your furniture has been sitting outside for more than a couple of seasons, this is completely normal. Resin wicker is incredibly durable, but UV exposure, moisture, and general outdoor life will absolutely take their toll on the color and surface finish.
Before you buy a single product or pick up a brush, take a few minutes to really look at what you’ve got. Check for cracked or broken strands in the weave — minor ones can be glued down, but large sections of unraveling may need a deeper repair or replacement. Inspect the frame underneath, usually aluminum or steel, for rust or bending. And wiggle the joints. If the whole thing feels structurally sound and it’s just dirty and faded, congratulations — you have a great weekend project ahead of you.
Step-by-Step: How to Clean and Restore Resin Wicker Patio Furniture
Step 1: Deep Cleaning First — Always
The Cleaner That Actually Cuts Through Years of Grime Without Stripping the Resin
The biggest mistake I see people make is attacking sun-damaged wicker with a pressure washer or harsh chemical stripper—you’ll destroy the finish faster than the sun already has. You need a cleaner specifically formulated for resin that lifts embedded grime and algae without compromising the material’s integrity.
What works
- Cuts through packed-in grime and green algae in the weave crevices without requiring aggressive scrubbing that can fray or crack brittle resin strands
- Safe enough to use on the aluminum or steel frame underneath without causing rust acceleration or etching
- Dries completely transparent with no residue, so you can immediately assess the actual color and condition of the wicker before moving to restoration steps
What doesn’t
- Won’t restore faded or chalky color on its own—it cleans the surface, but sun damage that’s baked into the resin still needs a topcoat or paint to restore original appearance
- Requires patience and proper drying time between application and inspection; rushing to paint over damp residue will show later as adhesion problems
I almost skipped the deep clean on my set because the sun damage looked so bad I thought the wicker was permanently compromised, but once that grime lifted away, I realized the actual structural color was much better than I thought—it completely changed my restoration strategy. Get the CLR Brands Outdoor Furniture Cleaner, 26 oz. and use it as your true first step before any other product touches the furniture.
CLR Brands Outdoor Furniture Cleaner, 26 oz.
I used this to cut through algae buildup without scrubbing away at fragile strands, then saw the actual wicker condition clearly underneath.
Check Price on Amazon →This post contains affiliate links. As an Amazon Associate, I earn from qualifying purchases at no extra cost to you.