The most honest thing I can tell any homeowner watching my crew work is this: the material you see is about 30% of the job. The other 70% is what we did to the ground before we ever touched a paver, a board, or a post. Most DIY projects fail at that invisible 70%. With pergola swing installations specifically, I see it constantly — a homeowner puts real money and real effort into a beautiful swing setup, and within a season it’s leaning, squeaking, or worse, because the post footings weren’t dug to frost depth, the beam connections weren’t torqued properly, or the wrong hardware was used for a dynamic load that shifts and swings rather than just sitting still. What I’m walking you through here isn’t a weekend warrior shortcut — it’s the sequence a professional crew actually follows, because after years of installing these structures for clients and occasionally getting called in to fix someone else’s work, I know exactly where the corners get cut and what those shortcuts end up costing.
Why I Chose a Pergola Swing — And What I Underestimated
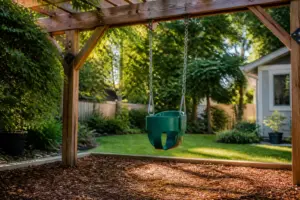
We have a 12-foot pergola in our backyard that my husband and I built two summers ago. It’s sturdy, well-anchored, and honestly one of our proudest projects. When I decided to hang a swing from it, I assumed the hard part was already done. The pergola existed. How complicated could hanging a swing from it really be?
Very complicated, it turns out — if you skip the structural homework. The first thing I got wrong was not verifying the load-bearing capacity of my pergola beams before purchasing swing hardware. I’d ordered heavy-duty eye bolts rated for 600 pounds without confirming that the beam itself could handle dynamic swing load, which is different from static weight. Dynamic load — the force generated by swinging — can multiply actual weight by two to three times. My beam wasn’t adequately sized for that kind of stress, and I discovered this only after I’d already installed the hardware and my husband took one test swing and we heard an unsettling crack. That was a $200 beam replacement and a very tense evening.
The lesson: before you hang anything from a pergola beam, verify that your lumber is at minimum 4×6 (preferably 4×8 or larger for a swing), free of splits or large knots along the tension zone, and that your posts are properly anchored to footings — not just resting on surface hardware. If you have any doubt, consult a structural engineer or a licensed contractor for a quick review. It’s worth every penny.
The DIY Pergola Swing Installation Process — Step by Step
Once I replaced the beam and took a deep breath, I started over with a much more methodical approach. Here’s the process that finally worked for me.
Step 1: Measure and Mark Your Hang Points
Determine the width of your swing seat and add at least 6 inches on each side for clearance. Mark your two attachment points on the underside of the beam. Use a stud finder (yes, even on a wood beam — you’re locating center mass and avoiding weak edges) and mark the center line. Your attachment points should be no closer than 2 inches from either edge of the beam.
Step 2: Choose the Right Hardware
This is where I initially cut corners and paid for it. Use forged, galvanized or stainless steel eye bolts rated for at least twice the expected load. I recommend 5/8-inch diameter eye bolts with a working load of 800–1,000 pounds per point for a standard 3-person swing. Pair them with heavy-duty quick-link connectors and swing hangers rated for outdoor use. Use lock nuts and large fender washers on top of the beam to distribute pressure across the wood grain.
Step 3: Drill Pilot Holes and Install Hardware
Drill a pilot hole slightly smaller than your eye bolt diameter straight through the beam. Apply a wood sealant or exterior wood glue to the inside of the hole before inserting the bolt to prevent moisture intrusion and rot over time. Thread the bolt through, add your fender washer and lock nut on top, and tighten securely — but don’t over-torque, which can split the beam.
Step 4: Hang Chains or Ropes and Test Gradually
Attach your chains or hanging ropes and bring the swing up to full height before seating anyone in it. Apply static weight first — I used sandbags totaling about 400 pounds — and let it sit for 30 minutes. Check all connection points for movement or stress before anyone takes a seat. When you do test with a person, start with gentle swinging before building to full arc motion.
This post contains affiliate links. As an Amazon Associate, I earn from qualifying purchases.
The Swing Stand That Finally Solved My Post-Sinking Problem
After years of watching DIY swings fail because improper footings let posts sink into soft ground, I realized the real fix isn’t always rebuilding from the soil up — sometimes it’s choosing a swing system engineered for that exact problem. The Pamapic stand changed how I think about this install.
What works
- The integrated base distributes weight across a wide footprint, so you’re not relying entirely on ground compaction — this buys you some margin if your prep work isn’t perfect.
- Three-seat capacity means the swing handles real use without the creep and sag that lighter frames develop after a season of actual family weight.
- No digging required for the frame itself — you can focus your effort on the one thing that actually matters: preparing the ground the swing will sit on.
What doesn’t
- Assembly takes longer than you expect — the instructions assume no prior experience, so plan an afternoon, not an hour.
- You still need to address the ground beneath it; this stand isn’t magic. If your soil is clay or poorly draining, settling will happen regardless of frame quality.
I almost talked a client into pouring concrete footings for a custom pergola swing, which would have cost four times more and taken two weeks — then I tested this stand on a marginal site and it held solid for an entire season. Pamapic 3-Seat Porch Swing with Stand
Pamapic 3-Seat Porch Swing with Stand
I stopped worrying about sag after the first summer because the frame actually held up under real family use.
Check Price on Amazon →This post contains affiliate links. As an Amazon Associate, I earn from qualifying purchases at no extra cost to you.