About eight years into my career, I was called out to look at a pathway a homeowner had installed themselves the previous spring. The stones were heaving, the edges were collapsing into the lawn, and weeds had completely consumed the gaps. They had spent nearly $600 on materials. The design itself was actually charming — a gentle curve through a cottage-style garden. The problem wasn’t the vision. The problem was every single decision made in execution.
That job stuck with me because the homeowner wasn’t careless. They just didn’t know what they didn’t know. I rebuilt that pathway in a single day using the same stones, and it still looks good today. The difference was process. That’s what I want to walk you through here — not inspiration, but the actual step-by-step thinking I use every time I approach a new pathway project. If you’re figuring out how to design a garden pathway that stays beautiful with minimal upkeep for years, this is the honest version of that conversation.
Start With Function, Not Aesthetics
I know that sounds counterintuitive when you’re standing in a garden center surrounded by beautiful flagstone samples. But every low-maintenance pathway starts with answering three questions before you pick a single material:
- Who uses this path and how often? A decorative meandering path through a flower bed sees maybe a few footsteps a week. A path from a side gate to a back door gets used daily, in every weather condition, often with muddy boots or a wheelbarrow. Those are completely different engineering problems.
- What is the drainage situation? Water is the enemy of every pathway. If your path sits in a low spot, collects runoff, or crosses a naturally wet area, your material and base choices have to account for that from the start — not as an afterthought.
- What is your freeze-thaw exposure? In hardiness zones 5 and below, I budget at least 30% more for base preparation than I would in a mild climate. Frost heave destroys pathways that would otherwise last decades. I’ve seen 2-inch concrete pavers pop like bottle caps after one hard winter because the base was only 2 inches deep.
Answer those three questions honestly and your material choices become much more logical — and your maintenance requirements drop dramatically.
The Design Layout Process I Actually Use
Once I understand the function, I physically walk the space with a can of marking paint or a garden hose. I let the hose sit for a full 24 hours before I make any decisions. Why? Because what looks like a natural, graceful curve when you’re standing there often looks awkward and cramped in daylight the next morning. Give your eye time to assess it.
For width, I follow a rule I’ve used for 17 years: minimum 24 inches for a decorative garden path, minimum 36 inches for any path that serves a practical function. Anything narrower than 24 inches feels like a tightrope when you’re actually walking it, and it telegraphs “afterthought” in photos. If the path has to turn, widen the turn. Tight-radius curves on narrow paths are one of the most common design errors I correct for other contractors.
For curves specifically, I use a technique I call “inside-out templating.” I mark the inside edge of the curve first, then measure out my consistent width to establish the outside edge. This keeps the curve radius uniform and prevents the lopsided banana shape that plagues DIY layouts.
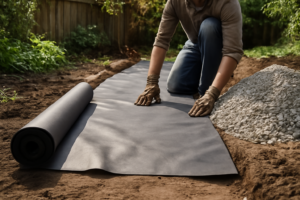
Base Preparation: Where Low Maintenance Is Actually Won
This is the section of every project that homeowners want to skip. I understand — it’s not glamorous work, and it’s not visible once you’re done. But 90% of pathway failures I’ve diagnosed over my career trace back to inadequate base preparation.
Here is my standard process for a stepping stone or paver pathway in a temperate climate:
- Excavate 4 to 6 inches below finished grade — 6 inches in freeze-thaw climates
- Compact the native soil with a plate compactor or hand tamper before adding any base material
- Add 3 to 4 inches of compacted crushed stone (I use 3/4-inch clean crush or Class II base depending on region)
- Top with 1 inch of coarse sand or stone dust for leveling and bedding
- Set your stones or pavers, then check level across every placement
Here is the honest caveat I give every client: if your soil is heavy clay, this process may not be enough. Clay holds water and moves seasonally in ways that even a well-built base can’t always overcome. In those situations, I add a layer of geotextile fabric between the native soil and the base material, and I recommend more flexible materials — like rubber or composite stepping stones — over rigid concrete or natural stone. Fighting clay with rigid materials is a losing battle over a 10-year horizon.
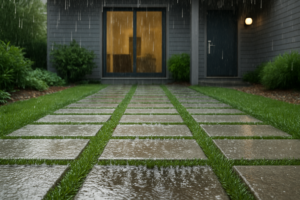
Edging: The Detail That Makes or Breaks Long-Term Appearance
Edging is where I see the most dramatic difference between pathways that look maintained and pathways that look neglected within two seasons. Without a defined edge, lawn grass migrates into the path joints, mulch migrates out, and the whole geometry of the pathway gradually softens into disorder.
Good edging also locks your pathway materials in place laterally. Pavers and stepping stones that aren’t bordered will slowly spread outward under foot traffic, creating gaps and uneven surfaces that become tripping hazards.
For most residential garden pathways, I install the edging before I set a single stone. I want it staked into undisturbed soil against the outside of my base material. That sequence matters — edging installed after the fact never holds as well.
Material Selection for Low Maintenance
My general hierarchy for low-maintenance performance, based on what I’ve seen hold up over 10-plus-year timelines:
- Concrete pavers: Excellent durability, very low maintenance, wide style range. Best value over time if installed correctly.
- Natural flagstone (dry-laid): Beautiful, but requires more base depth and occasional releveling every 5 to 7 years in colder climates.
- Rubber or composite stepping stones: Underrated for ease of installation and resilience. They flex slightly with ground movement rather than cracking or heaving. Good choice for garden beds with softer soil.
- Pea gravel or decomposed granite: Low upfront cost but requires edging discipline and annual topping off. Not truly low maintenance — just low upfront cost.
- Wood rounds or timber: Avoid for anything other than purely decorative use. They rot, they get slippery, and they fail fast in any climate with meaningful rainfall.
Weed Suppression That Actually Works
I’ll keep this direct: landscape fabric under pathways is largely a myth for long-term weed control. Within 3 to 5 years, organic material accumulates on top of the fabric, and weeds root into that layer anyway. The fabric then makes renovation harder, not easier.
What actually works: a dense, well-compacted base that leaves no organic material for weed seeds to germinate in, joint compound (polymeric sand for paver joints, or stone dust), and consistent edging that prevents lateral weed migration from lawn areas. Address weed control at the design stage, not as a product layered on top of shortcuts.
This post contains affiliate links. As an Amazon Associate I earn from qualifying purchases.
What I Use and Recommend
For most DIY pathway edging installs, flexible plastic landscape edging is the practical choice — it follows curves cleanly, installs without heavy equipment, and holds when properly staked. I’ve been recommending the MIXC 100ft Landscape Edging Kit with 150 Spikes to clients who are doing their own installs. The 150-spike count matters — I see a lot of edging kits that undercount the spikes, and you end up with sections that lift between anchor points. This kit comes in three 33-foot rolls, which gives you flexibility on smaller projects to only open what you need.
If you’re working around a curved bed or a pathway with tighter radius turns, the Amazon Basics Flexible Landscape Edging Coil is worth considering for its 5-inch depth. Deeper edging resists lateral grass migration better than shallower profiles, and the coil format makes it easier to work with on long, sweeping pathway edges.
For stepping stones specifically — particularly in garden beds where ground movement is more variable — I’ve started recommending the Sekcen 3 Pack Rubber Stepping Stones to homeowners who want an approachable DIY option. Rubber pavers handle minor ground movement without cracking, they’re comfortable underfoot, and they’re genuinely forgiving for first-time installers who are still working out base depth consistency. I won’t use them on a high-traffic utility path, but for a garden walk-through they perform well and look clean.
The Finish Work Most People Rush
Before I call any pathway complete, I do a final walkthrough — literally walking the entire path at normal pace, paying attention to any wobble or rock in individual stones. A stone that moves under your foot on day one will move more with time and weather. I reset every single one before leaving. I also look at the path from multiple angles and distances. Pathway design is as much about the view from a window or a seating area as it is about the experience of walking through it.
Final joint filling, edge soil backfill, and a light compaction pass over the whole surface — those last 45 minutes of work protect the previous six hours of installation.
The Bottom Line
Knowing how to design a garden pathway that stays low-maintenance comes down to this: make the invisible decisions correctly. Nobody sees your base depth or your edging stake spacing. But everyone sees — and feels — the results of those decisions two, five, and ten years later. Do the unglamorous work well, choose materials appropriate to your climate and soil, and the aesthetic choices almost take care of themselves. That’s the version of this process I’ve spent 17 years refining, and it’s the same one I’d use in my own backyard.
The Edging That Finally Stopped My Pathways from Collapsing Into the Lawn
That homeowner’s pathway failed partly because the stones had no structural containment—the edges just drifted outward into the grass year after year. Proper landscape edging is the invisible load-bearing detail that separates a pathway that lasts from one that becomes a maintenance nightmare.
What works
- The metal spikes are long enough to anchor through shifting soil and seasonal frost heave—I’ve pulled sections up after three winters and found them exactly where I left them.
- 100 feet covers a realistic pathway project without leaving you short, and the kit includes enough spikes that you can space them properly (every 18–24 inches) instead of guessing and hoping.
- The rigid plastic lip creates a clean, defined border that your eye actually registers—curves feel intentional instead of accidental, which was exactly what that cottage garden needed.
What doesn’t
- The plastic can crack if you drive a spike through frozen ground without pre-drilling—learned that the hard way on an early spring install in compacted clay.
- It’s not invisible; if aesthetics matter (and they do on a cottage pathway), you’re committing to black plastic showing at the edge unless you backfill and landscape heavily.
I almost switched to cheaper aluminum edging on my last job, thinking the plastic would look too utilitarian for a design-forward space—but the performance difference made the aesthetic compromise worth it. Grab the MIXC 100ft Landscape Edging Kit with 150 Spikes and don’t skip the edging step like that homeowner did.
MIXC 100ft Landscape Edging Kit with 150 Spikes
I’ve pulled sections up after three winters and found them exactly where I left them.
Check Price on Amazon →This post contains affiliate links. As an Amazon Associate, I earn from qualifying purchases at no extra cost to you.