This post contains affiliate links. As an Amazon Associate, I earn from qualifying purchases at no extra cost to you.
There is no faster way to make a tired, grimy patio look brand new than a good pressure washing session. I’ve seen years of embedded dirt, algae, and staining disappear in an afternoon — and the transformation is genuinely satisfying. But I’ve also watched homeowners blast permanent gouges into pavers, strip joint sand right out of the gaps, and etch ugly stripe marks into concrete that will never fully go away. Knowing how to pressure wash a patio the right way is the difference between a surface that looks restored and one that looks damaged. This guide covers everything I’ve learned through trial, error, and a few expensive mistakes, so you can skip straight to the good results.
Choosing the Right Pressure Washer
The first decision is electric versus gas, and for most residential patios the answer is electric. Electric pressure washers typically run between 1,300 and 2,000 PSI — enough to handle standard concrete, pavers, and stone without white-knuckling the wand trying to manage a machine with too much power. They’re lighter, quieter, and you don’t have to deal with gas, oil, or engine maintenance. If you have a large driveway extension attached to your patio or you’re dealing with years of serious buildup, a gas unit in the 2,500–3,500 PSI range gives you more punch and better flow rates for faster coverage. For most weekend patio jobs, though, electric is the practical choice.
After testing several options over the past few seasons, the one I keep coming back to for regular patio work is the Westinghouse ePX3100v Electric Pressure Washer. It delivers up to 2,100 Max PSI and 1.76 Max GPM, which hits the sweet spot for cleaning concrete and pavers without going overboard on pressure. What I particularly appreciate is the pro-style steel wand — it makes a real difference in control compared to the plastic wands on cheaper units — and the detachable foam cannon is genuinely useful for pre-treating a patio surface before you start washing. The built-in carry handle makes moving it around the yard easy, and setup takes about five minutes. It’s the machine I recommend to neighbors who ask what to buy before tackling a patio cleaning project.
If you want a step up in power while staying electric, the Westinghouse ePX3500 Electric Pressure Washer is worth serious consideration. It pushes up to 2,500 Max PSI — enough to handle heavy concrete cleaning jobs — and it comes with a five-nozzle set that gives you real flexibility depending on the surface you’re working on. The onboard soap tank keeps your cleaning solution right on the machine instead of in a separate bucket, and the anti-tipping technology is a feature I’ve genuinely come to appreciate because a tipped pressure washer mid-job is an annoying interruption. This is what I used on my patio last spring when I was dealing with some seriously embedded algae, and it handled everything without breaking a sweat.
The single best accessory you can add to any pressure washer — and I say this without any hesitation — is a surface cleaner attachment. A standard wand creates uneven pressure as you sweep back and forth, which is exactly what causes those zebra-stripe marks you see on improperly cleaned concrete. A surface cleaner spins two or more nozzles in a controlled circular pattern just above the surface, delivering even coverage with zero stripe marks. It also cleans significantly faster than wanding by hand. I’ve used the 14″ Pressure Washer Surface Cleaner with 4 Wheels on multiple jobs and it earns its place every time. The stainless steel construction holds up to repeated use, the four wheels let it glide smoothly across flat surfaces without scratching, and the 14-inch cleaning width moves through a standard patio quickly. If you only buy one accessory, buy this one.
For larger patios or anyone running a higher-PSI gas machine, the Westinghouse Universal 16.5″ Pressure Washer Surface Cleaner Attachment is the upgraded option I’d point you toward. It’s rated to 4,400 Max PSI and uses a standard 1/4-inch connector, meaning it works with both gas and electric pressure washers. The wider 16.5-inch cleaning path covers more ground per pass, which adds up to real time savings on larger areas. The stainless steel build feels serious and durable, and the universal fit means you’re not locked into one brand ecosystem. This is a worthwhile investment if you plan to pressure wash regularly rather than just once.
On the rent versus buy question: if you’re doing one patio once, renting a gas unit from a home improvement store for $50–$80 a day is perfectly reasonable. But if you have a patio, driveway, walkway, and siding — and you plan to maintain them annually — buying an electric unit pays for itself quickly and gives you the flexibility to clean on your schedule rather than around a rental window.
Pressure Settings by Surface Type
Using the wrong PSI setting for your specific surface is the most common cause of pressure washing damage, and it’s completely avoidable once you understand what each material can handle.
- Concrete: 2,500–3,000 PSI. Concrete is the most durable patio surface and can handle high pressure without damage. Use a 25-degree nozzle or your surface cleaner attachment for general cleaning. For heavy staining or oil spots, a 15-degree nozzle at close range works well.
- Pavers: 1,500��2,000 PSI. Pavers themselves are fairly durable, but the joint sand between them is not. High pressure will blast the sand right out of the joints, which destabilizes the entire surface. Stay at moderate pressure, use a surface cleaner rather than a wand, and plan to re-sand the joints after washing.
- Natural stone (flagstone, slate, bluestone): 1,200–1,500 PSI. Natural stone is where I see the most damage from overzealous pressure washing. These surfaces are porous and softer than concrete, and high pressure can pit, chip, or erode the surface permanently. Use a wide 40-degree nozzle and keep your distance. When in doubt, go lower on the pressure.
- Wood decking: 1,000–1,500 PSI. Wood will literally gouge and splinter at higher pressure settings, especially if the wood has any age on it. Use a 40-degree nozzle, keep the wand moving constantly, and always spray with the grain rather than across it. A surface cleaner is not ideal for wood — stick to the wand here and be deliberate with your distance.
Step-by-Step Patio Pressure Washing
Good results come from following the right sequence, not just pointing water at the ground. Here’s how I approach a full patio cleaning job from start to finish.
Clear and Prep the Surface
Move all furniture, planters, grills, and any other items completely off the patio. Don’t just push them to one side — water and cleaning solution will travel further than you expect. Sweep off all loose debris including leaves, dirt, and any accumulated material in corners. Skipping this step means you’re washing debris around instead of actually cleaning the surface, and it can also clog your surface cleaner attachment.
Pre-Treat with Cleaning Solution
For anything beyond light dust, a pre-treatment step makes a significant difference in the final result. Apply a dedicated patio or concrete cleaner to the entire surface and let it dwell for at least 10 minutes — longer for heavy algae or mildew. Don’t let it dry on the surface, especially on stone. This step loosens embedded grime so the pressure washer removes it more effectively and with less aggressive settings. A detergent-injection system or foam cannon, like the one included with the ePX3100v, makes application fast and even.
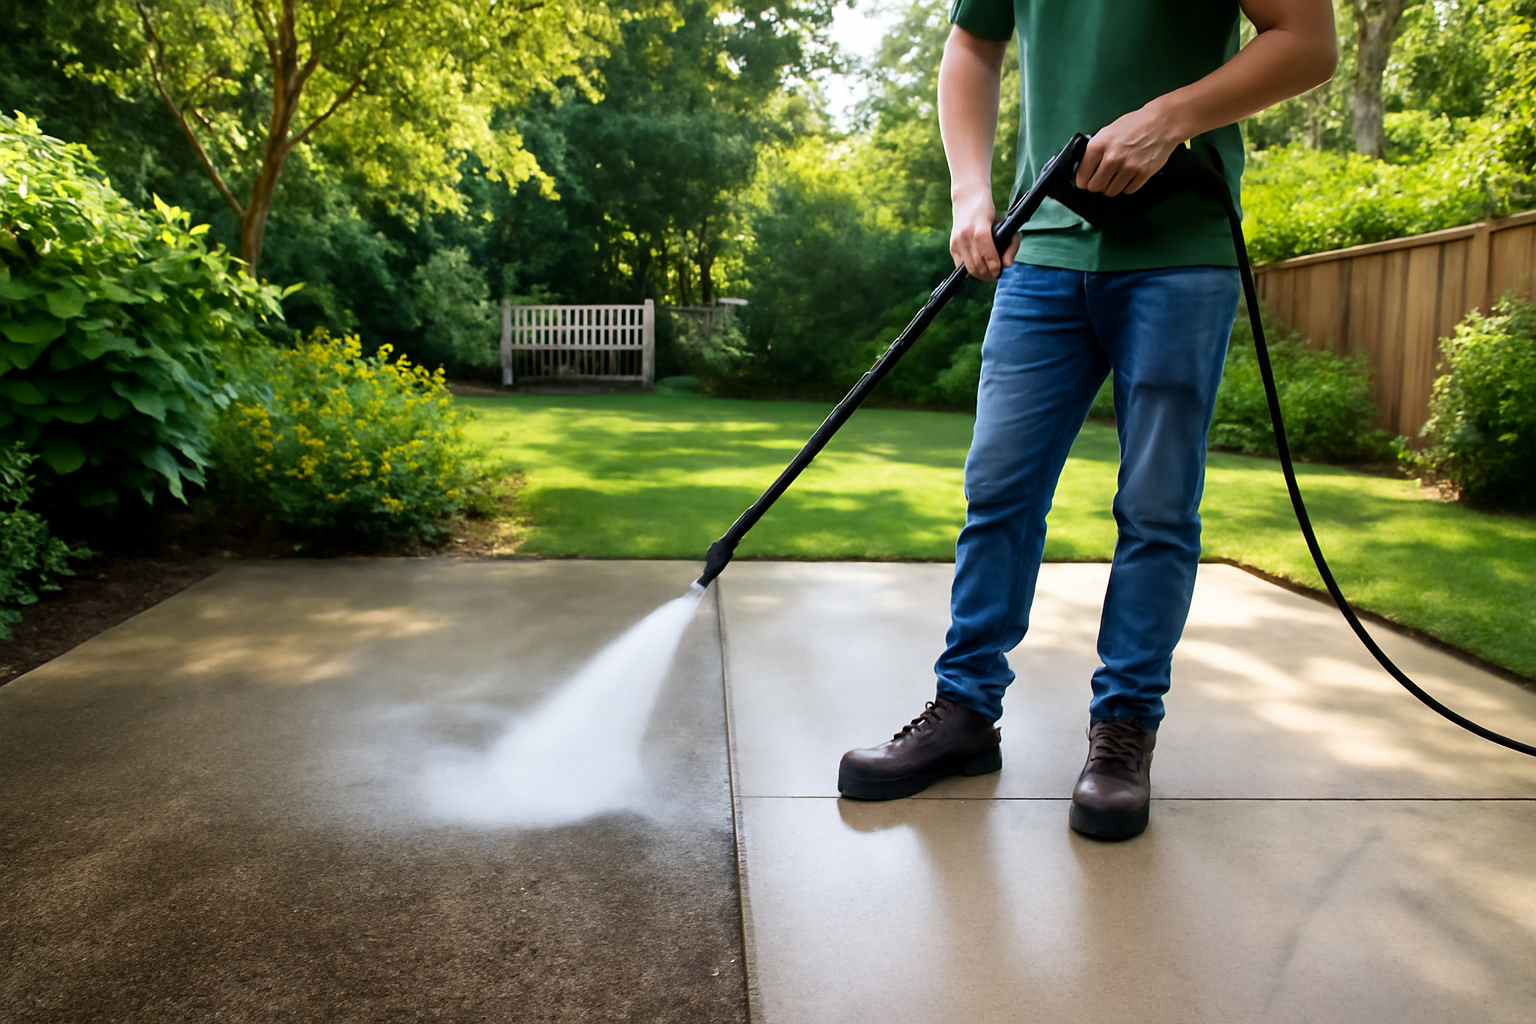
Wash High to Low, Toward Drainage
Always start at the highest point of your patio and work toward the natural drainage direction. Water carries loosened dirt with it, and you don’t want to wash clean areas back over dirty runoff. Maintain a consistent nozzle distance of 8–12 inches from the surface — closer for stubborn stains, further for delicate materials. Overlap each pass by about 50 percent to avoid leaving uncleaned lines between passes. Keep the wand or surface cleaner moving at a steady, consistent pace. Stopping in one place for even a few extra seconds can etch the surface.
Rinse Plants and Surrounding Areas
Once you’ve finished the main surface, do a quick rinse of any plants, lawn edges, or garden beds that received cleaning solution overspray. Most patio cleaners are not fertilizer-friendly, and letting detergent sit on plant material can cause damage. A light fresh-water rinse is all it takes to prevent issues.
After Pressure Washing: Seal or Treat the Surface
Pressure washing strips away not just dirt but also any existing sealer on your patio surface. That’s actually a good thing — it means you’re starting fresh — but it does mean the surface is now exposed and more vulnerable to staining, weed intrusion through joints, and weathering. This is the ideal window to apply a sealer, and skipping it means the next cleaning job will be harder than it needed to be.
Wait a full 24–48 hours after pressure washing before applying any sealer or treatment. The surface needs to be completely dry, not just visually dry on top. Trapping moisture under a sealer leads to cloudiness, adhesion failure, and eventually peeling. In humid climates or shaded areas, I sometimes wait the full 48 hours just to be safe.
For paver patios, this is the perfect moment to re-sand the joints with polymeric sand and then seal the entire surface. The pressure washing process cleans out the joints completely, giving the new sand excellent penetration and bonding conditions. A quality paver sealer applied now will protect the joint sand, enhance the color of the pavers, and reduce future weed growth significantly. For concrete patios, a penetrating concrete sealer or an acrylic film-forming sealer both work well depending on the level of sheen you prefer. Apply according to the manufacturer’s directions — two thin coats almost always outperform one heavy coat.
Knowing how to pressure wash a patio properly is really only half the equation. The sealing step afterward is what locks in those results and keeps the surface looking clean for years rather than months. I’ve skipped it before and regretted it every time — the same algae and staining comes back twice as fast on an unsealed surface.
Final Thoughts
Learning how to pressure wash a patio well doesn’t take long, but the difference between a careful, informed approach and a careless one shows up immediately and permanently. Match your pressure settings to your surface, use a surface cleaner attachment to eliminate stripe marks, follow the cleaning sequence from high to low, and seal the surface while you have the opportunity. Done right, pressure washing is one of the highest-return maintenance tasks you can do around your home — a few hours of work that makes the entire outdoor space look like a different property. Take your time, respect the material you’re working on, and the results will speak for themselves.