This post contains affiliate links. As an Amazon Associate, I earn from qualifying purchases at no extra cost to you.
I’ve built six paver patios over the past decade — from a modest 120-square-foot side yard pad to a 600-square-foot entertainment space with a built-in fire pit area. Every single time, I come back to the same conclusion: knowing how to build a paver patio isn’t the hard part. The hard part is doing the unglamorous prep work correctly and not cutting corners when your back is screaming at you on day two. Get the base right, and your patio will look great twenty years from now. Ignore it, and you’ll be releveling sunken pavers every spring. This guide walks you through the full paver patio installation process, step by step, with the honest details most tutorials skip.
Materials and Tools You’ll Need
Before you break ground, get everything staged and ready. Running to the hardware store mid-project kills momentum and invites mistakes. Here’s what you’ll need for a standard paver patio DIY project.
Materials
- Pavers — concrete, natural stone, or brick (calculate your patio square footage and add 10% for cuts and waste)
- Gravel base — Class II road base or crushed limestone (4 inches compacted depth)
- Leveling sand — coarse bedding sand or concrete sand (1-inch layer)
- Polymeric sand — for filling joints and locking pavers in place
- Landscape fabric — optional but worth it for weed suppression
- Plastic edge restraints — to prevent lateral spreading
Tools
- Plate compactor (rent locally or buy — more on that below)
- 4-foot level and a long straightedge
- Rubber mallet
- String line and wooden stakes
- Screed pipes (1-inch diameter conduit works perfectly)
- Circular wet saw or angle grinder for paver cuts
- Wheelbarrow, shovel, and a plate tamper for tight spots
For quantity calculations, measure your patio area in square feet, then multiply by 1.10 to account for waste. For gravel, a 4-inch compacted base over 200 square feet requires roughly 2.5 tons — always round up when ordering.
If you’re doing more than one project or just want to own your equipment outright, I’d seriously look at the VEVOR 6.5HP Plate Compactor. I picked one up after renting for years and the math finally made sense. This machine runs a 196CC gas engine and delivers 5,600 VPM with 2,360 lbs of compaction force — that’s commercial-level performance at a DIY price point. The 22.1 x 15.9-inch plate covers ground fast, and it handles gravel base, sand, and finished paver surfaces without issue. If you’ve got a large patio or plan to tackle a driveway project down the road, this is the one to own.
For smaller patios — say, under 150 square feet — or tighter budget builds, the VEVOR 2.8 HP Plate Compactor is a solid, more compact option. It’s EPA compliant, puts out 5,250 VPM and 1,920 lbs of force, and the 18.7 x 11.8-inch plate is easier to maneuver in tighter spaces. I’ve used this model along fence lines where the bigger machine couldn’t fit, and it handled the job cleanly. Don’t let the smaller size fool you — for a standard backyard patio, this gets the job done right.
Step 1: Layout and Excavation
This is where your patio either starts strong or starts crooked. Use wooden stakes and string lines to define the exact perimeter of your patio. Pull the strings tight — any sag throws off your measurements. Use a square to confirm 90-degree corners, and measure corner to corner diagonally to make sure everything is square. Mark the perimeter with spray paint so you have a clear cut line once the stakes come out.
Now dig. You need to excavate 7 to 8 inches deep to accommodate your 4-inch gravel base, 1-inch sand layer, and the thickness of your pavers (typically 2.375 inches for standard concrete pavers). Remove all sod, roots, and organic material — anything that can decompose and cause settling later.
Critical detail that gets skipped in almost every beginner guide: slope your excavation away from the house at 1/8 inch per foot. On a 12-foot-wide patio, that’s 1.5 inches of drop from the house edge to the outer edge. It sounds trivial until you’ve got standing water pooling against your foundation after a rainstorm. Set your string lines to reflect this slope and use them as your reference throughout the entire build.
Step 2: Gravel Base and Compaction
I’ll say it plainly: this step determines whether your patio lasts five years or fifty. If you rush the base, you will be resetting pavers. Period.
If you’re installing landscape fabric, lay it now across the excavated area and up the sides. Overlap seams by at least 6 inches. This won’t stop every weed, but it significantly reduces root intrusion into your base over time.
Add your Class II road base or crushed limestone in 2-inch lifts — not all at once. Spread the first 2 inches, wet it lightly, then compact it thoroughly with your plate compactor. Make two to three passes in one direction, then two to three passes perpendicular. You want the surface to stop moving visibly under the machine before you add the next lift. Repeat for the second 2-inch lift. Your finished gravel base should be firm, level (with your drainage slope maintained), and not shifting underfoot at all.
This is the most physically demanding part of the entire paver patio DIY process, and it’s where having the right compactor matters most. Under-compacted base material is the single biggest cause of paver failure — don’t leave it to chance.
Step 3: Sand Bed and Paver Installation
With your gravel base compacted and solid, lay your 1-inch screed pipes parallel across the surface, spaced about 4 to 6 feet apart. These act as depth guides. Pour coarse bedding sand between and around them, then drag a straight 2×4 across the pipes to create a perfectly flat, 1-inch sand bed. Pull the pipes out carefully and fill those channels with loose sand — do not compact the sand bed.
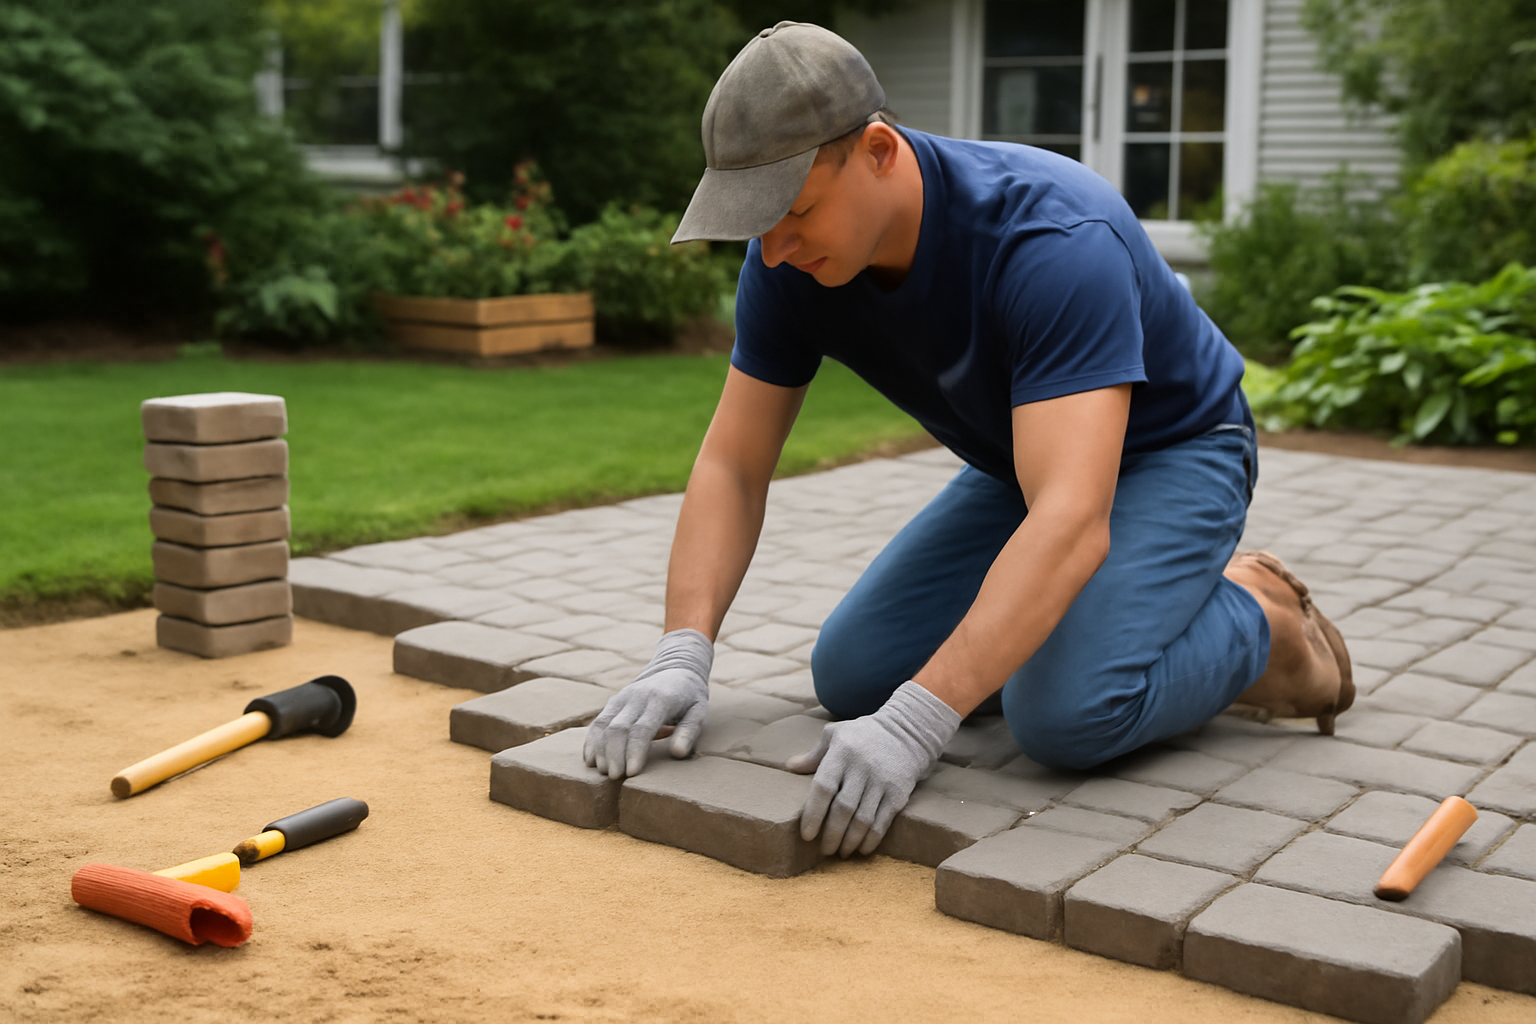
Start laying pavers from one corner — typically the corner closest to the house or the most visible angle. Work outward in a pyramid pattern, keeping consistent joint spacing (usually 1/8 to 3/16 inch). Use your rubber mallet to tap each paver firmly into the sand, and check your level frequently. Do not walk on laid pavers without kneeling boards to distribute your weight — you’ll create depressions in the sand bed.
When you reach the edges, measure and mark cuts with a pencil or chalk line. A wet saw gives clean, professional edges. For curves or irregular cuts, an angle grinder with a diamond blade works well. Install plastic edge restraints along all perimeter edges using steel spikes driven into the gravel base — these prevent the entire patio from slowly creeping outward over time. Skipping edge restraints is one of the most common mistakes I see on DIY builds.
Step 4: Joint Sand and Final Compaction
Once all pavers are laid and edge restraints are secured, pour polymeric sand across the surface and sweep it into every joint using a push broom. Work it in diagonally, then sweep again. The joints should be filled to within 1/8 inch of the paver surface — not flush, not overflowing.
Run your plate compactor over the entire finished surface to set the pavers firmly into the sand bed and pack the joint sand down. Use a rubber pad or piece of carpet under the compactor plate if your pavers are textured or easily scratched. Make two passes across the whole area.
After compaction, add a final thin layer of polymeric sand and sweep again to top off any joints that settled. Then, using a garden hose set to a gentle mist — not a direct stream — wet the entire surface evenly. This activates the binding polymers in the sand, which harden as they cure and lock everything in place. Avoid foot traffic for 24 hours and heavy use for 48 hours.
For joint sand, I’ve tested several products and I keep coming back to the Rhino Power Bond Plus Polymeric Sand. This 10-pound bag in Slate Gray handles joints up to 2 inches wide, which covers most standard paver installations. What I appreciate most is how consistently it cures — it sets firm without becoming brittle, and I haven’t had the crumbling or washout issues I’ve experienced with cheaper brands. The color holds well over time too, which matters on a patio you’ve put real work into.
If your paver joints are wider — between 1/8 inch and up to 4 inches — or if you want maximum long-term flexibility, the DOMINATOR Polymeric Sand with Ceramic Flex Technology is genuinely impressive. After using it on a natural stone patio with variable joint widths, I was sold. The ceramic flex formula resists cracking through freeze-thaw cycles better than standard polymeric sand, and the professional-grade hold is noticeable. If you’re building in a climate with harsh winters, this is the product I’d choose without hesitation.
Common Paver Patio Mistakes to Avoid
After building multiple patios and watching friends attempt their own, the same errors come up repeatedly. Here’s what to watch for on your own paver patio installation:
- Insufficient base depth — 4 inches compacted gravel is the minimum. Going shallower because you hit clay or didn’t want to dig further will result in frost heaving and sinking.
- Skipping compaction between lifts — adding all your gravel at once and compacting once on top is not the same. You need compaction every 2 inches to achieve true density throughout.
- No drainage slope — flat patios pool water. Your 1/8-inch-per-foot slope must be set during excavation and carried through every layer.
- Compacting the sand bed — your leveling sand should stay loose until the pavers are laid and the final pass is done. Pre-compacting it destroys your screeded surface.
- No edge restraints — pavers will migrate outward without them. It won’t be obvious immediately, but within two to three years, you’ll see joint gaps widening at the perimeter.
- Watering polymeric sand too aggressively — a hard stream washes the sand out of joints before it can cure. Always use a gentle mist setting.
Final Thoughts: DIY Cost vs. Hiring a Contractor
Learning how to build a paver patio yourself isn’t just satisfying — it’s significantly cheaper. Professional paver patio installation typically runs $15 to $25 per square foot in labor alone. On a 300-square-foot patio, that’s $4,500 to $7,500 in contractor labor before materials. Doing it yourself, you’re looking at roughly $3 to $6 per square foot in materials depending on your paver choice and region. The savings are real, and the result — when you follow the steps correctly — is every bit as durable as professional work. Knowing how to build a paver patio from scratch is a skill that pays for itself the first time you use it, and every project after gets faster and better. Take your time on the base, don’t skip compaction, and use quality materials in the joints. Your patio will be standing long after the neighbors’ contractor-built one needs a reset.