I’ve been paving driveways for twenty years, and the most common thing I hear from homeowners is some version of this: “I just ignored it and hoped it would go away.” A small crack becomes a pothole. A pothole becomes a $4,000 replacement. This complete driveway maintenance guide exists because that cycle is entirely preventable — and I want to be the contractor who finally explains it clearly, without upselling you on something you don’t need.
Over two decades, I’ve worked on thousands of driveways across all climates and conditions. I’ve sealcoated fresh asphalt in 95-degree heat and patched freeze-thaw damage in February. I’ve talked homeowners out of unnecessary replacements and, honestly, talked a few into replacements they kept delaying too long. That experience is what I’m putting into this guide.
Whether your driveway is asphalt, concrete, or pavers, this guide covers everything: sealcoating schedules, crack repair, stain removal, drainage fixes, winter preparation, and how to know when repair stops making sense. Bookmark it. Come back to it. That’s exactly what it’s built for.
Asphalt vs. Concrete: Know What You’re Working With
The single biggest mistake I see is homeowners applying the wrong maintenance approach to their driveway material. Asphalt and concrete behave very differently. They age differently, fail differently, and need different care. Getting this wrong wastes money and can actually accelerate damage.
Asphalt is a flexible pavement. It’s bound together with bitumen, a petroleum-based binder that stays slightly pliable. That flexibility is its strength — it handles freeze-thaw cycles better than concrete. However, that same binder oxidizes over time. UV rays and oxygen slowly break it down, turning a rich black surface gray and brittle. Sealcoating slows that oxidation significantly. Without it, you’re looking at serious surface degradation within 5–7 years.
Concrete is a rigid pavement. It handles heavy loads well and can last 30–50 years with minimal intervention. That said, it’s vulnerable to deicing salts, surface spalling, and joint cracking. You don’t sealcoat concrete the same way you do asphalt. Concrete sealers are penetrating or film-forming products specifically formulated for alkaline surfaces. Using an asphalt emulsion sealer on concrete does nothing — I’ve seen people try it.
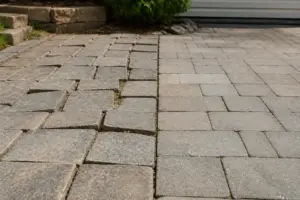
Pavers — whether concrete, brick, or natural stone — are their own category. They need joint sand replenishment, weed prevention, and a paver-specific sealer. For a deeper dive on paver-specific care, see [INTERNAL LINK: paver sealing and maintenance guide].
Sealcoating Your Asphalt Driveway: Timing, Frequency, and Process
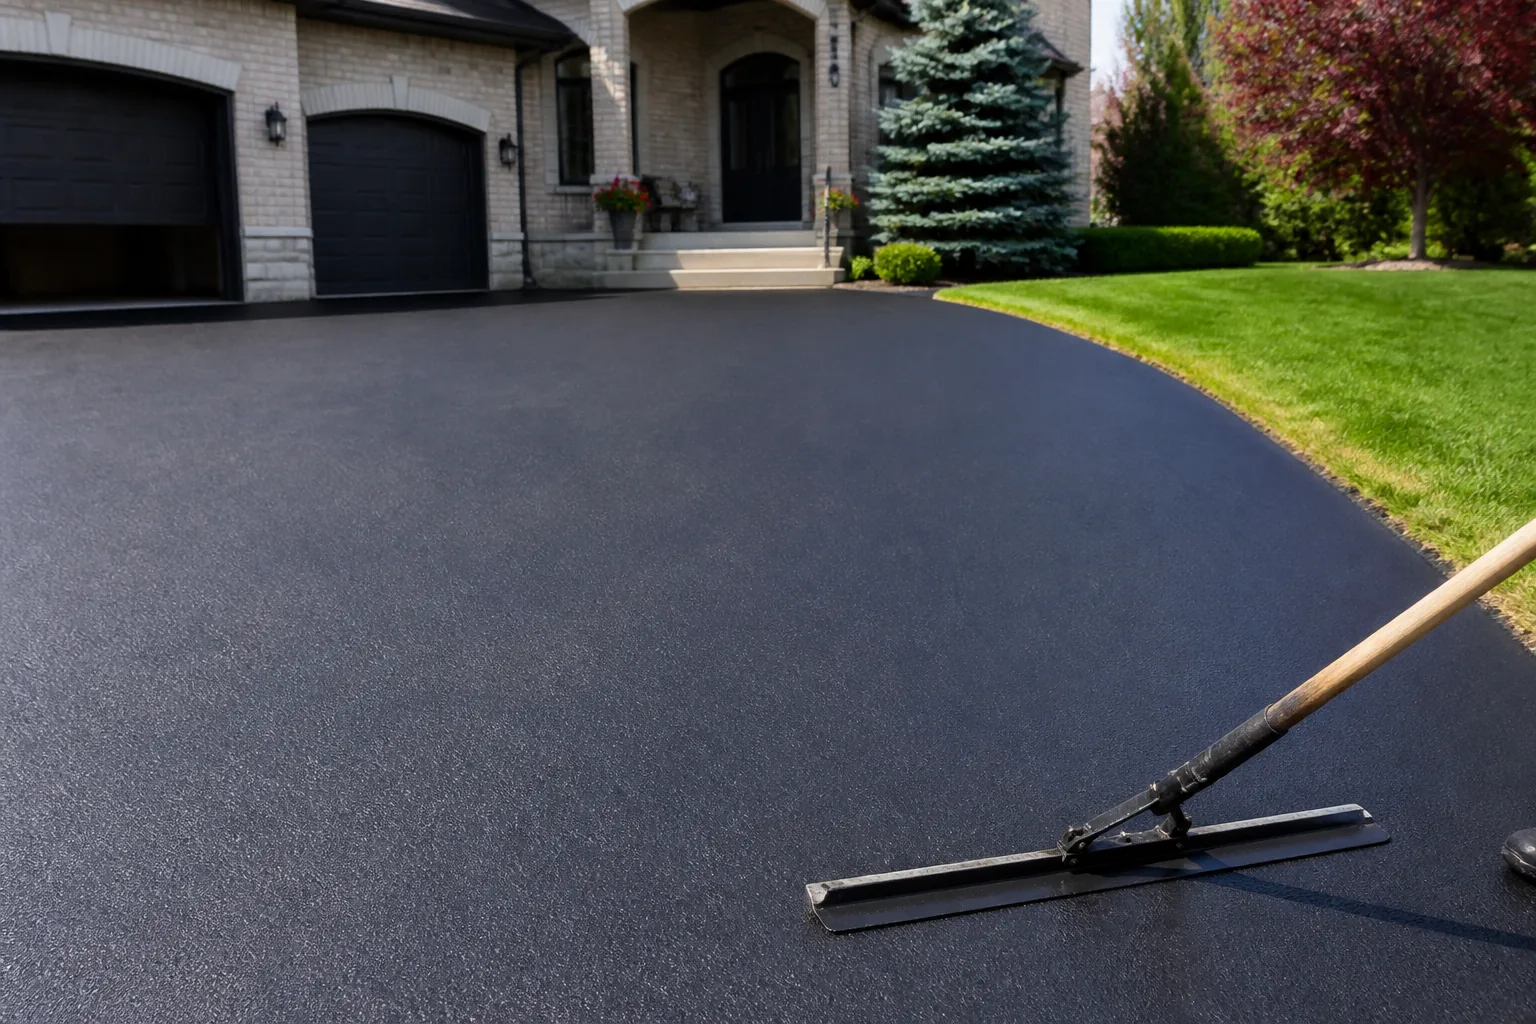
Sealcoating is the single highest-return maintenance task for an asphalt driveway. Done correctly and on schedule, it can effectively double your driveway’s lifespan. Done incorrectly, it’s wasted money — or worse, it creates a slippery surface or traps moisture.
When to Apply the First Coat
New asphalt needs to cure before it gets sealed. I always tell customers: wait a minimum of 90 days, and ideally 6–12 months. Fresh asphalt contains volatile oils that need to off-gas. Seal it too early and you’ll trap those oils, causing the surface to stay soft and track into your home. I learned this the hard way on one of my first jobs — sealed a driveway at 60 days because the customer pushed for it, and we were back fixing tracked sealer on the garage floor two weeks later.
How Often Should You Reseal?
The standard interval is every 2–3 years for most residential driveways. In hotter climates with intense UV exposure, lean toward every 2 years. In milder climates with good drainage, every 3 years is fine. Don’t over-seal. Applying sealer every year builds up thick layers that eventually crack and peel. You want thin, even coats — not a rubber shell.
A simple test I use: pour a small amount of water on the surface. If it beads up, the existing sealer is still doing its job. If it soaks in immediately, you’re due for a fresh coat.
Temperature and Weather Requirements
Temperature matters more than most people realize. Apply sealer only when air and pavement temperatures are above 50°F — and ideally above 60°F. You need at least 24 hours without rain after application. Applying in direct afternoon sun on a 95-degree day is also a problem: it dries the sealer too fast and leaves lap marks. Overcast mornings in the 65–80°F range are ideal conditions.
[INTERNAL LINK: best time of year to sealcoat your driveway]
Crack Repair: What Type of Crack Are You Dealing With?
Not all cracks are equal. Before you reach for a crack filler, identify what you’re actually looking at. The type of crack tells you both the cause and the correct fix.
Hairline and Surface Cracks
Hairline cracks — under 1/4 inch wide — are usually surface oxidation. The binder has dried out and the top layer is shrinking. These respond well to a quality crack filler or liquid crack sealer, followed by sealcoating. Address them early. A hairline crack costs a few dollars to fix. Left alone through one winter, water infiltrates, freezes, expands, and you’ve got a 2-inch wide trench.
Alligator Cracking
Alligator cracking — that interconnected web of cracks resembling reptile skin — is a structural failure signal. It means the base layer beneath the asphalt has failed or shifted. Filling the surface cracks is a temporary fix at best. In my experience, alligator-cracked sections need to be cut out, the base regraded or compacted, and new asphalt installed over it. There’s no sealer that repairs a bad base.
Concrete Joint and Slab Cracks
Concrete driveways crack at control joints — those intentional grooves cut into the slab. That’s by design. However, when cracks appear mid-slab or when joint cracks exceed 1/4 inch wide, you need a polyurethane or epoxy injection repair. For cracks under 1/4 inch, a self-leveling polyurethane sealant works well. Above 1/2 inch, especially with vertical displacement, evaluate whether the slab needs mudjacking or replacement.
Cost reference point: professional crack repair on asphalt typically runs $100–$400 depending on linear footage. Concrete crack injection repair often runs $150–$600 per crack depending on depth and access.
Stain Removal and Surface Cleaning
Stains on a driveway aren’t just cosmetic. Oil and fuel stains actively degrade asphalt binder. On concrete, they penetrate the porous surface and can become permanent if ignored. Act quickly — most stains are easiest to remove within the first 24–48 hours.
Oil and Grease Stains
For fresh oil on asphalt, absorb the excess with kitty litter or dry sand first. Then apply a degreaser and scrub with a stiff brush. Rinse with a pressure washer — 1,500–2,000 PSI is plenty for residential driveways. Don’t exceed 3,000 PSI on asphalt or you risk pulling aggregate loose. On concrete, a higher-alkaline degreaser works well, followed by a thorough rinse.
Old, set-in oil stains on asphalt can be stabilized with a primer before sealcoating — otherwise the oil bleeds through the sealer coat. I’ve seen beautiful new sealcoat jobs ruined by a mechanic’s driveway with oil spots that weren’t primed first.
Rust, Leaf, and Tire Stains
Rust stains on concrete respond to oxalic acid cleaners. Apply, let it dwell for 10–15 minutes, and scrub. Rinse thoroughly — oxalic acid leaves a residue if not fully washed off. Tire marks are typically rubber transfer and come off with a degreaser and brush on both asphalt and concrete. Leaf stains, especially from walnut trees, require an enzymatic cleaner or diluted bleach solution on concrete. Avoid bleach on asphalt — it can accelerate binder breakdown.
Routine Cleaning Schedule
I recommend a light pressure wash or sweep every spring and fall. Before sealcoating, the surface must be completely clean and dry — this isn’t optional. Any debris or moisture trapped under sealer causes adhesion failure. For concrete, an annual wash and inspection is a good baseline habit.
Drainage: The Hidden Factor That Destroys Driveways
Poor drainage is responsible for more driveway failures than people realize. Standing water on a driveway surface is damaging. Water infiltrating beneath the pavement is catastrophic. Yet drainage is almost never mentioned in basic driveway maintenance guides — and that’s a serious oversight.
Surface Slope Requirements
A properly installed driveway should have a cross-slope of at least 1–2% — that’s roughly 1/8 to 1/4 inch of drop per foot of width. This ensures water runs off the sides rather than pooling. If your driveway is flat or pitched the wrong direction, water pools and eventually works its way into the base through cracks or edges. I’ve seen base failures on 5-year-old driveways caused entirely by a 1% slope problem that was never corrected.
Edge Damage and Side Drainage
Driveway edges are the most vulnerable point. When grass or soil builds up alongside the edge, water gets trapped against the pavement rather than draining away. Keep edge vegetation trimmed below the pavement surface. If you see edge crumbling or the shoulder has built up, excavate a drainage swale alongside the driveway to restore flow.
French drains and channel drains at the base of sloped driveways can intercept runoff before it undercuts the driveway. If your garage sits at the low end of a sloped driveway, a trench drain across the apron is one of the best investments you can make — typically $500–$1,500 installed, and it prevents thousands in future damage.
Winter Preparation and Cold-Weather Care
Winter is the harshest season for any driveway surface. Freeze-thaw cycles, deicing chemicals, and snowplow blade contact all take a toll. Preparation in the fall is your best defense.
Fall Prep Checklist
- Fill all cracks before first frost — water in unsealed cracks expands by approximately 9% when it freezes, turning hairline cracks into major ones overnight
- Sealcoat asphalt driveways before temperatures drop below 50°F consistently — typically September or October in northern climates
- Clear drainage paths so snowmelt doesn’t refreeze on the driveway surface
- Mark driveway edges with stakes or reflectors if snowplowing — blade contact is the #1 cause of edge chipping on concrete
- Inspect and clear any trench drains or channel drains before freeze-up
Deicing Chemicals and Surface Damage
Rock salt — sodium chloride — is the most common deicer, and it’s also the most damaging to concrete. It accelerates freeze-thaw spalling and corrodes rebar in reinforced slabs. Specifically, avoid rock salt on concrete driveways that are less than 3 years old — the surface hasn’t fully hardened and is highly vulnerable. Use sand for traction instead.
Calcium chloride works at lower temperatures (down to -25°F) and is less damaging than rock salt, though still not harmless. Magnesium chloride is a better option for concrete — it’s effective down to about -13°F and significantly gentler on surfaces. For asphalt, salt-based deicers are less of a surface concern, but they can still damage any vegetation alongside the driveway and accelerate edge deterioration.
Snowplow Guidelines
If you’re plowing yourself, set blade height to leave 1/2 inch of snow on the surface rather than scraping bare. This protects the surface from blade contact and reduces the need for heavy deicers. For concrete driveways, rubber-edged plow blades are available and worth the upgrade — steel blades on concrete spall the surface over time.
When to Repair vs. When to Replace
This is the question I get asked most often, and I’ll give you an honest answer rather than defaulting to “when in doubt, replace.” Replacement is expensive — typically $3,000–$8,000 for a standard residential asphalt driveway, and $5,000–$12,000 for concrete depending on size and region. It’s not always the right call.
Signs That Repair Still Makes Sense
- Cracks are isolated and less than 1/2 inch wide
- The base is still solid — no significant settling or heaving
- Less than 25–30% of the surface shows cracking or damage
- The driveway is under 15 years old for asphalt, or under 25 years for concrete
- Drainage is adequate and potholes are isolated
Signs That Replacement Is the Right Call
- Widespread alligator cracking covering more than 30% of the surface
- Multiple potholes or large depressions indicating base failure
- Significant vertical displacement between slabs (concrete) indicating soil movement
- The driveway is over 20 years old (asphalt) or 40+ years (concrete) with extensive damage
- Repair estimates are consistently running 50–70% of replacement cost
One honest rule of thumb I use: if I’m quoting repairs at more than 50% of what a new installation would cost, I tell the homeowner to put that money toward replacement. You’ll get a warranty, a proper grade, and 20 more years out of a fresh installation. [INTERNAL LINK: asphalt driveway replacement: what to expect and what it costs]
Common Mistakes and Frequently Asked Questions
Mistake #1: Sealcoating Over Existing Damage
Sealer is a protective coating, not a repair product. I see this constantly — homeowners apply a fresh coat of sealer hoping it will “fill in” cracks or hide deterioration. Sealer over unrepaired cracks traps moisture and causes the crack to grow faster. Always repair cracks first, let the filler cure fully, then sealcoat. The repair comes first. The sealer comes second.
Mistake #2: Using Rock Salt on a New Concrete Driveway
Concrete needs at least 30 days to cure after installation — and honestly, you should avoid harsh deicers for the first full winter. New concrete is porous and highly susceptible to salt damage. Surface spalling from salt on new concrete is irreversible short of resurfacing. Use sand for traction and patience for the first season.
Mistake #3: Neglecting the Edges
The edges of an asphalt driveway are unsupported on one side. They’re always the first to crumble under vehicle weight. Most homeowners drive right to the edge habitually. However, keeping tires 6–8 inches from the edge dramatically extends edge life. I also recommend backfilling along edges with compacted gravel to provide lateral support — it’s a simple fix that costs almost nothing.
FAQ: Can I Sealcoat My Driveway Myself?
Yes — with caveats. Squeegee application works for small driveways if you follow the correct process: clean thoroughly, repair cracks, apply in the right temperatures, and use thin coats. Spray application requires equipment most homeowners don’t own. For driveways over 1,000 square feet, professional application is usually worth the cost — typically $0.15–$0.25 per square foot for a contractor. A DIY kit costs less but requires significant labor and prep time.
FAQ: How Long Does Sealcoat Last?
A properly applied coat lasts 2–3 years under normal residential traffic. High-traffic areas — near the apron and end of the driveway — wear faster. Parking spots under trees that drip sap or drop debris also show faster wear. These high-wear zones sometimes need spot recoating between full applications.
Final Thoughts: Your Complete Driveway Maintenance Guide in Practice
Twenty years in this industry has taught me one thing above everything else: driveways don’t fail suddenly. They fail because small problems were ignored long enough to become structural ones. This complete driveway maintenance guide gives you the knowledge to catch those problems early — and the confidence to know what actually requires a professional versus what you can handle yourself.
Here’s the maintenance rhythm I recommend for most homeowners:
- Every spring: Inspect for winter damage, clean the surface, fill any new cracks
- Every fall: Fill remaining cracks before first frost, clear drainage paths, check your sealcoat schedule
- Every 2–3 years: Sealcoat asphalt driveways, inspect concrete joints and apply joint sealant as needed
- As needed: Address stains, edge vegetation, and drainage issues as they appear — don’t wait for your next scheduled inspection
You don’t need to be a contractor to take good care of your driveway. You just need a consistent schedule and the willingness to address small issues before they grow. The homeowners I respect most aren’t the ones who spend the most — they’re the ones who pay attention.
If you’re ever unsure whether what you’re looking at needs professional attention, reach out. I’d rather answer a question early than quote a full replacement later.
About This Article

Written by Marcus Delvecchio. Marcus Delvecchio isn't a licensed contractor — he's a handyman and DIY outdoor landscaper who got obsessed with driveways, patios and pavers after redoing his own place badly enough to want to understand why. Twenty years later he spends his weekends on his own projects and on side jobs for neighbours and friends around the mid-Atlantic, and writes up what actually worked, mistakes included. More about this site.
Scope and limits. Marcus is a homeowner who got obsessive about driveways, not a licensed contractor. Structural repair, drainage changes, and anything requiring a permit should go to a licensed contractor.
Verify this against a primary source
Specifics change, and your situation may differ from the one described here. These are the authorities worth checking directly:
- Concrete Masonry & Hardscapes Association — segmental paver installation standards
- National Asphalt Pavement Association — asphalt placement and maintenance guidance
- Portland Cement Association — concrete durability and jointing