Sealing is the step homeowners either skip entirely or do twice as often as necessary — and both mistakes damage the surface. After years of being called in to strip and redo botched sealing jobs, I’ve developed a pretty clear checklist for what to do, when to do it, and which products are actually worth the money. I’ve seen it all on job sites: pavers sealed while still holding moisture, sealers applied in direct afternoon sun, multiple coats laid down before the first one cured — every one of those shortcuts shows up eventually as clouding, peeling, or a surface that traps grime instead of repelling it. What I’m laying out below isn’t pulled from a label or a YouTube tutorial; it’s what I actually tell clients after we finish an install and hand the yard back to them. If you follow this the way I’d walk a homeowner through it on-site, your pavers will hold up the way they were meant to.
I thought I was doing everything right. I’d watched a handful of YouTube videos, bought a mid-grade sealer from a big-box store, and spent an entire Saturday applying it with a paint roller. I even did it twice — once the first year, and again the year after when I noticed it wasn’t looking quite right. By year three, the surface was a patchwork of white haze, flaking sealer, and dark blotchy spots that made our otherwise beautiful patio look like something out of a haunted house. My wife had stopped inviting friends over for evening dinners on the patio, and I’d spent close to $400 between product, supplies, and wasted weekends. It stung.
Where I Went Wrong (And Why It’s More Common Than You Think)
When my contractor friend — a guy named Marcus who’s been in the hardscaping business for over fifteen years — sat me down with a coffee and walked me through my mistakes, I wanted to disappear into the ground. But honestly? I was also relieved. Because everything he told me made complete sense once someone with real experience explained it.
Here’s what I had been doing wrong:
- I never cleaned the pavers properly before sealing. I’d given them a quick rinse with the garden hose and called it good. Marcus told me that any dirt, efflorescence, or old sealer residue left on the surface gets locked in permanently. That white haze I was seeing? That was trapped moisture and old product that had nowhere to go.
- I applied too much sealer. More is not better with paver sealers. A thick coat traps gases, can’t cure evenly, and peels. You want thin, even coats — and usually two of them, not one heavy one.
- I sealed pavers that were still damp. I had sealed in the morning after an overnight rain. The pavers looked dry on top, but they weren’t — and that moisture bubbled and clouded the sealer from underneath.
- I used the wrong type of sealer for my paver material. I had tumbled concrete pavers, and the solvent-based formula I grabbed wasn’t well-suited for their porosity level or my climate.
How to Seal Pavers Correctly: The Process Marcus Taught Me
Marcus didn’t just tell me what I did wrong — he came back the following weekend and walked me through the right way, step by step. I’m going to share that process with you now, because it genuinely changed everything about how our patio looks and performs.
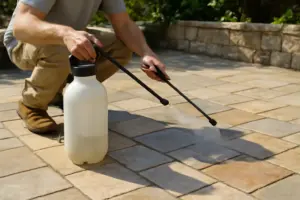
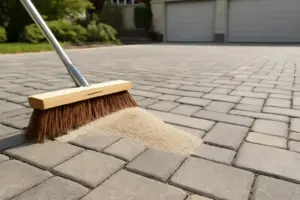
Step 1: Strip and Clean Thoroughly
If you’ve previously sealed your pavers with a film-forming sealer, you need to strip it before applying anything new. Use a chemical stripper designed for concrete and pavers, then pressure wash the entire surface. Let it dry — and Marcus means really dry — for at least 48 to 72 hours in warm weather, longer in cooler or humid conditions. Don’t rush this step. It is the step.
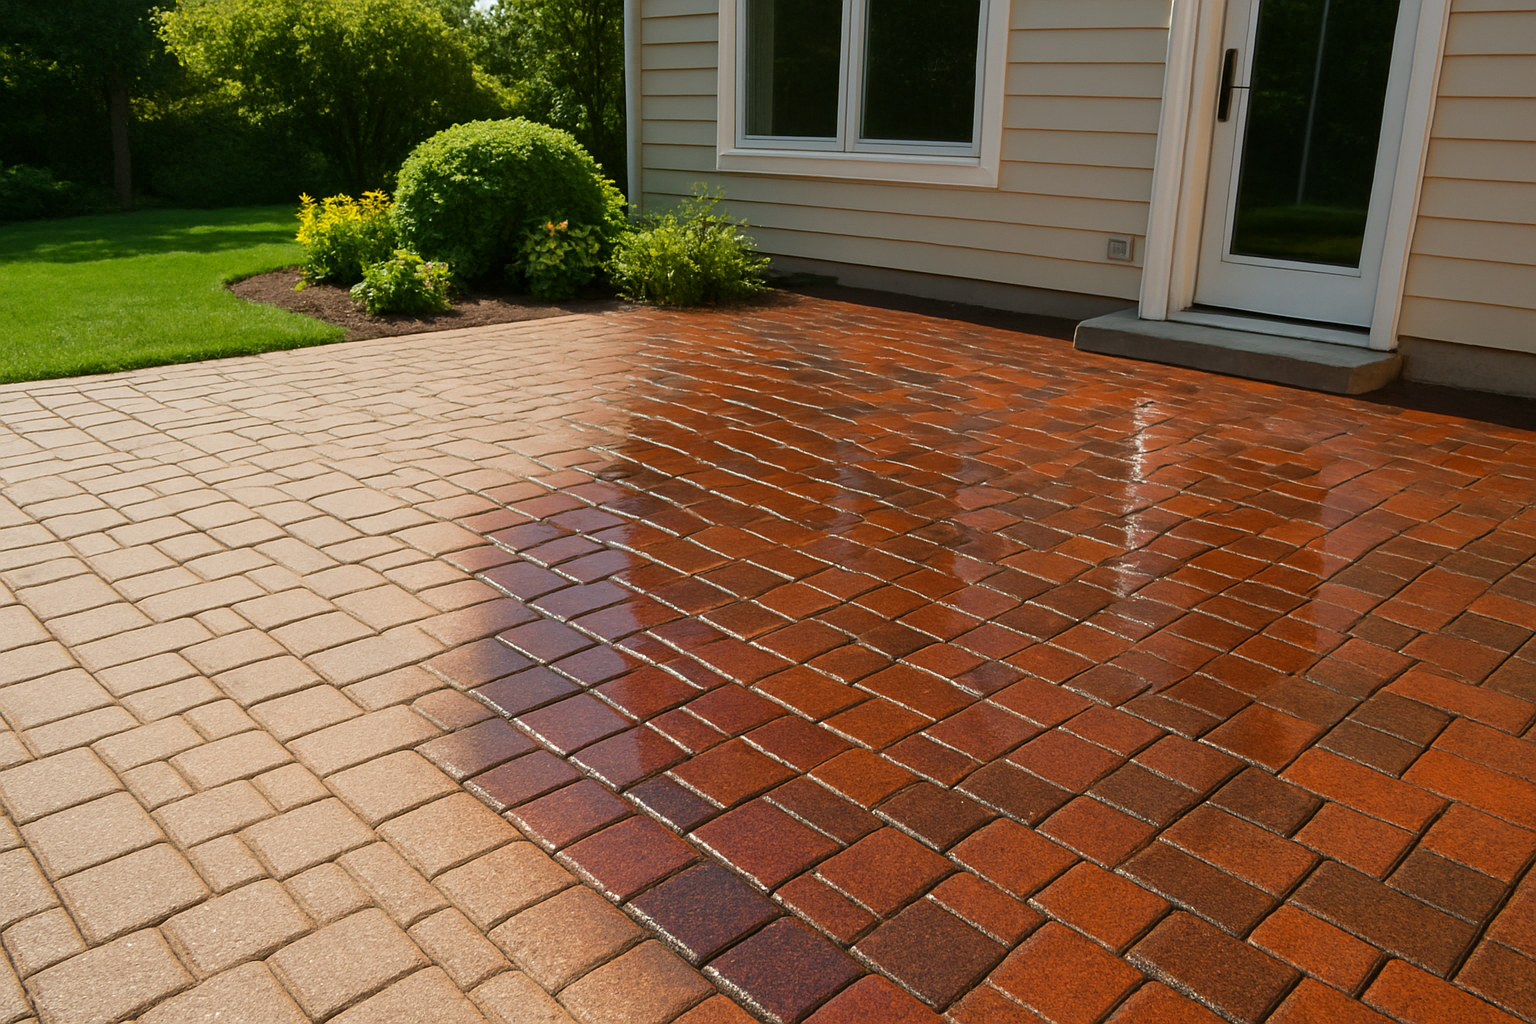
Step 2: Choose the Right Sealer for Your Surface and Goals
This is where a lot of DIYers get tripped up. There are two main categories: penetrating sealers (which soak into the paver and protect from within) and topical sealers (which form a protective film on the surface). Topical sealers come in a range of sheens — from matte to high gloss. Your choice should depend on the paver material, your desired finish, and whether you want color enhancement.
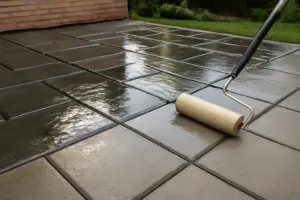
Step 3: Apply in Thin, Even Coats
Use a low-nap roller or a pump sprayer for large areas. Apply your first thin coat, let it dry according to the manufacturer’s instructions, then apply a second thin coat. Do not apply in direct hot sunlight or when rain is forecasted within 24 hours. Temperature matters too — most sealers should be applied when it’s between 50°F and 90°F.
Step 4: Stay Off It and Let It Cure
Step 4: Stay Off It and Let It Cure
Most sealers are dry to the touch in a couple of hours, but full cure can take 24 to 72 hours. Keep foot traffic off the surface and keep it dry during that window. Patience here saves you from scuff marks and adhesion issues.
The Sealer That Finally Convinced Me to Wait Between Coats
After stripping and resealing my pavers three times because I rushed application, I needed a product that actually worked well with a slower, deliberate approach. Shabebe Premium Stone Sealer changed how I think about paver protection—it performs best when you respect the cure window, not when you try to speed through the job.
What works
- Thin, even coverage on the first coat actually holds—you don’t feel the need to immediately layer another coat to “make sure it takes”
- Cures predictably within 48 hours, which forces you into a realistic timeline instead of the 24-hour temptation that leads to wet-on-wet mistakes
- Water beads consistently on properly sealed pavers, so you get visual proof the first coat worked—eliminating the doubt that drives over-application
What doesn’t
- The 1-gallon container runs out faster than expected if your driveway is larger than 400 square feet—you’ll need to calculate coverage carefully upfront
- Won’t forgive application in direct sun; it’ll dry too fast and leave visible streaks, so afternoon application is genuinely off-limits
I’ll admit I almost abandoned this product after the first coat looked thin compared to my old over-application habit—that moment of panic nearly sent me back to the old mistakes. But I waited the full 48 hours, and the results proved the patience was worth it. Grab Shabebe Premium Stone Sealer (1 Gallon) and commit to doing it once, right.
Shabebe Premium Stone Sealer (1 Gallon)
I stopped second-guessing my first coat once water beaded up within 48 hours.
Check Price on Amazon →This post contains affiliate links. As an Amazon Associate, I earn from qualifying purchases at no extra cost to you.